It has now been exactly 7 weeks since I started working from home. In the beginning this went with full energy, but now gradually the energy and the focus on the work is starting to drain.
I'm the only one in here? I'm sure, I'm not.
I regularly hear this among colleagues. Despite the traffic jams, the car ride to and from the office also brought relaxation. You now have to find this relaxation in other ways.
Where I was in Teams meetings all day at the beginning of the Lockdown, I now try to limit that and put more focus time into my agenda. This is not quite 100% successful but the beginning is there.
My children are a bit older now and they don't find it easy to go to school online, but need little or no supervision with their school work. But colleagues with younger children also have to help their children with school in addition to their work and then it becomes completely difficult to keep combining everything, work, school, entertainment, all in all a tough job. Fortunately, my employer helps and supports these colleagues well.
What have I learned for myself recently:
My day starts every day between 7.30am and 8:00 am, not much different then my normal office hours. My hourly meetings become 50 minutes and meetings of half an hour 25 minutes, this way you can recover before you go to the next meeting. But try to get away from your screen.
File => Options => Calendar
I make blocks in my calendar: An hour in the morning to exercise. An hour at lunchtime for lunch and walking. 30 minutes in the afternoon, away from screen time.
I plan regular coffee moments with my team. I dress like I normally would go to the office. And the spontaneous phone calls are not missing in the above.
In addition to the above, together with colleagues (facilitated by my employer), who want to participate, we have 3 Virtual Gym Moments(20 min) and of course the Friday afternoon drink with music, pub quiz or something else in terms of entertainment.
Where I have not found immediately a solution for, how do I end my day? Often after dinner I go back to work, at that moment I have a lot of focus and because of that it often gets quite late. I'm still looking for a good ending of the day, that used to be the moment when you got into the car at a customer site or office and you drove home. Any suggestions?
Oh yes, and taking a day off to do nothing at all is also wonderful.
Applying the above points gives me more focus and energy in my work. Which points do you apply? I look forward to hearing your response in the comments below.
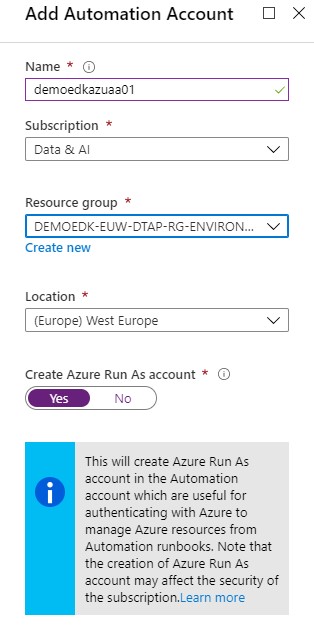
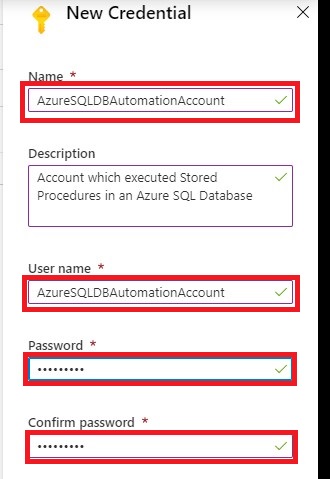
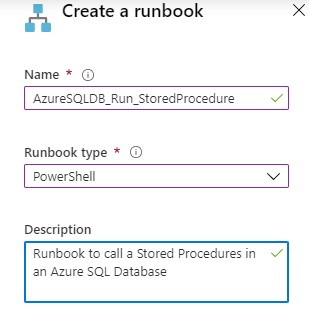
For my test environment I want to load every day new increments into the WideWorldImporters Azure SQL Database with Azure Automation. The following Stored Procedure is available to achieve this.
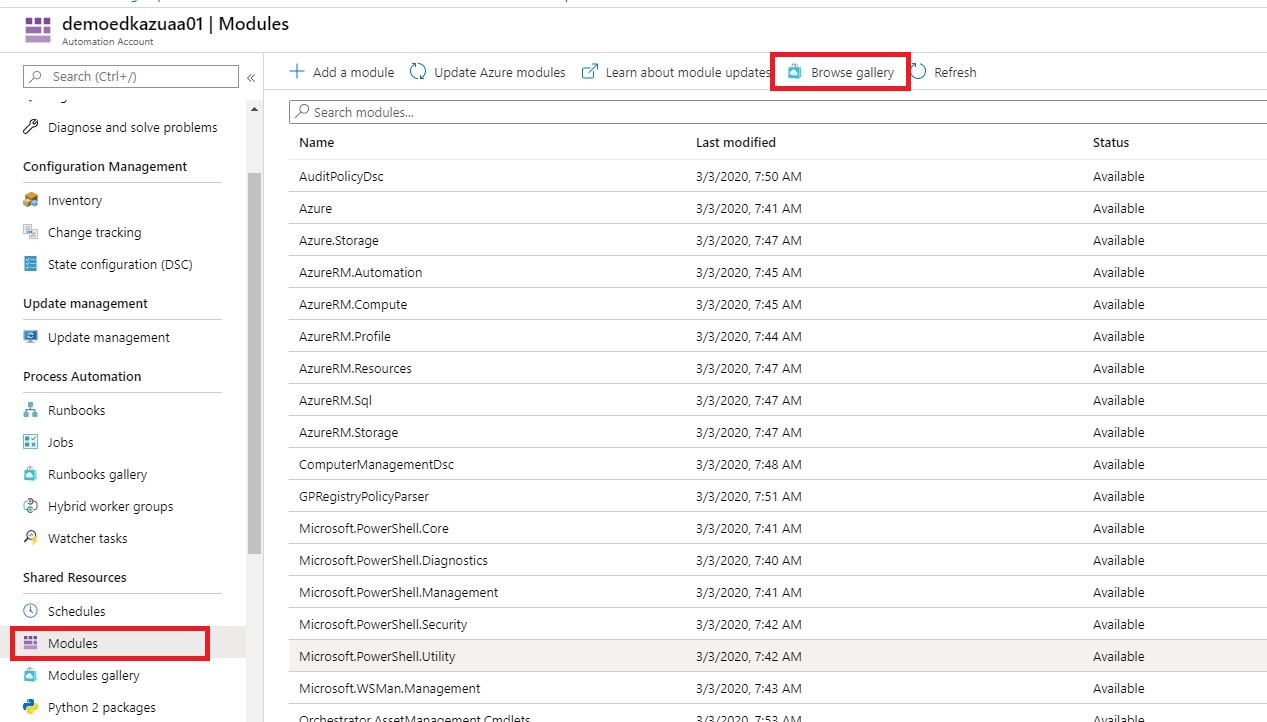
This a simple Powershell script which can execute a Stored Procedure. More details about the PS Invoke-Sqlcmd can be found here. You can download the Powershell script from my Github
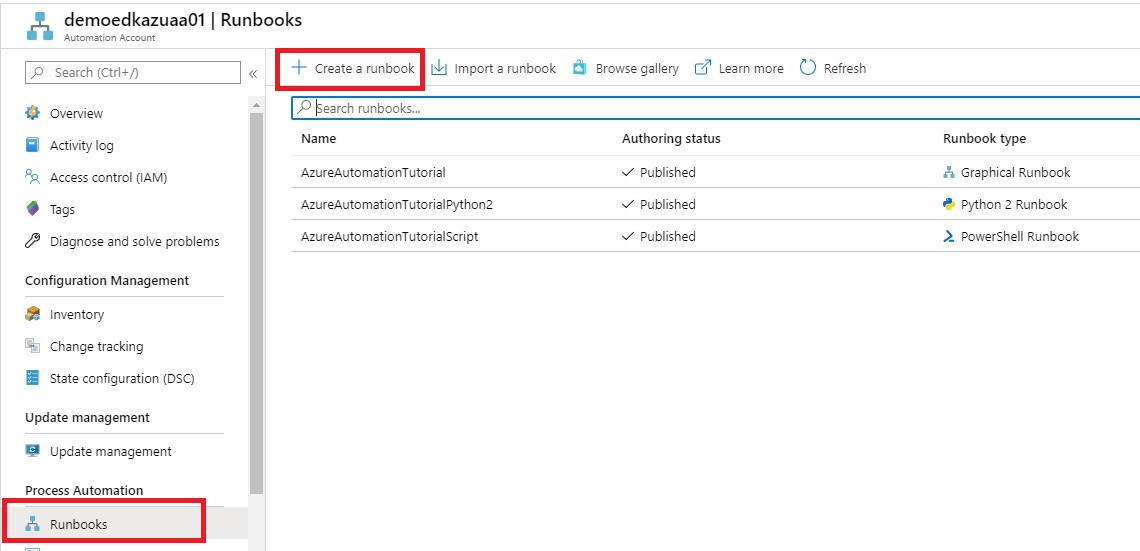
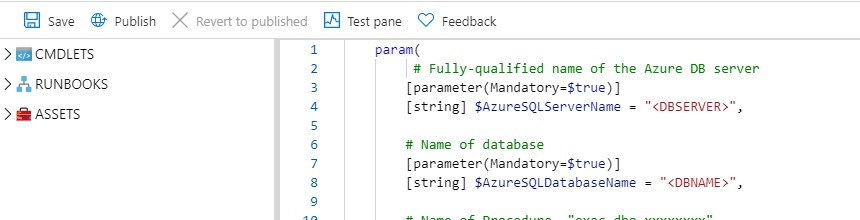
Save the Runbook and then test the runbook. After you tested your Runbook you can Publish the Runbook
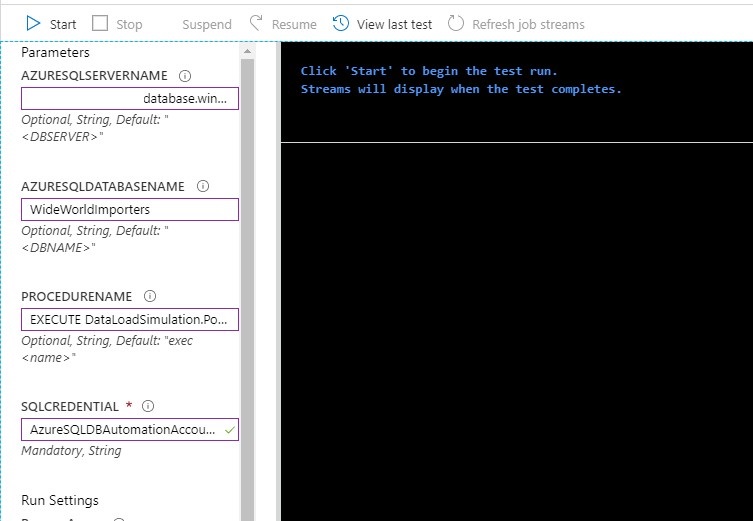
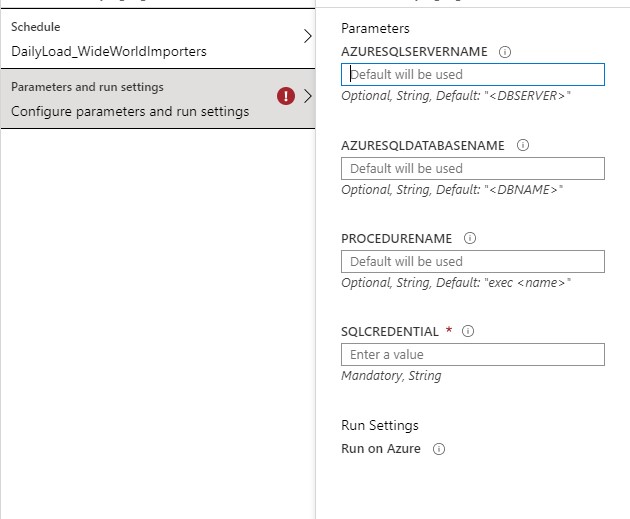
Fill in the requested Parameters as showed in the picture above and click on Start. The requested procedure will be executed.
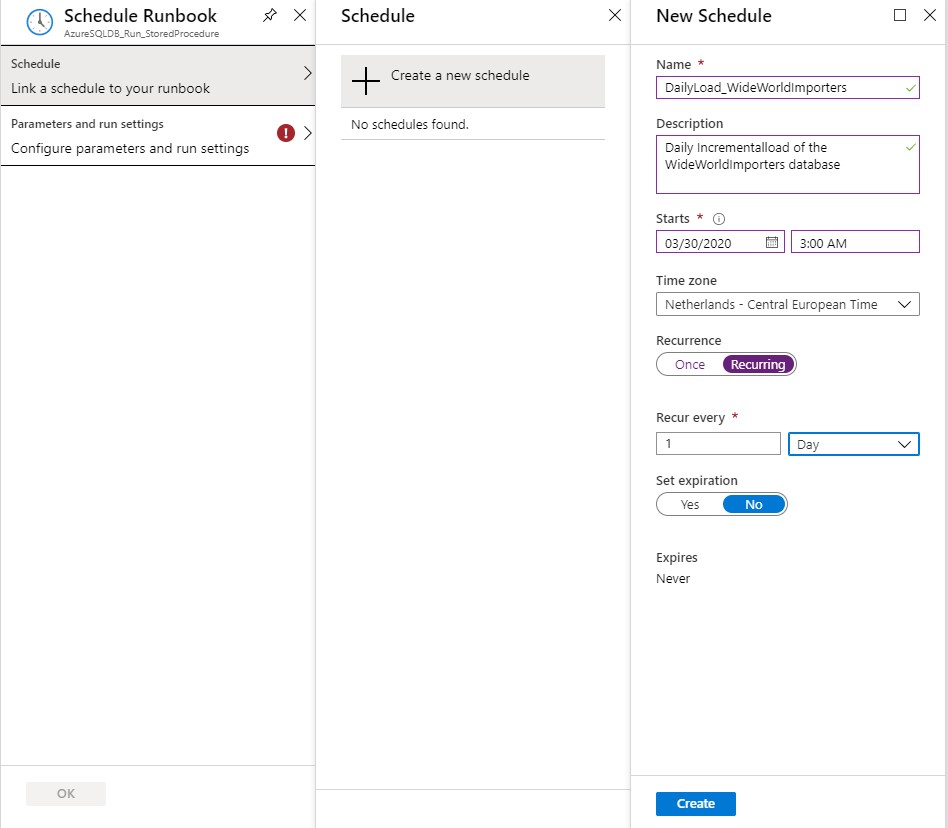
Create A Schedule
That last step is create a Schedule which will run every day to incremental load your data.
Define a Name, Schedule Start Time and the Recurrence for the Schedule and click on Create
Fill in the requested Parameters and click on Save.
I assume that you have now succeeded in creating an Azure Automation Account with these steps and that you could execute a Stored Procedure in an Azure SQL Database. If you have any questions, leave a message in the comments below. Thanks for reading.
TIP:
To update your database to the current date you have to run this procedure quit lot of times so create a query where you execute the Procedure 100x times in a row. The downloaded database has data up to may 2016.
In case you get error regarding the Temporal Tables, check your errors in thisblog post. I helped me a lot.
I my next blog I will describe how you easily can extract data(full and Incremental) from your WideWorldImporters Database to Azure Data Lake Gen2 with Azure Data Factory.
Normally I always write Azure related, but today I'm writing about something different, on how I can control my Nest Thermostat on my Domoticz Server (Home automation).
A while ago I have upgraded my Nest Thermostat to login with Google. What happened after the upgrade, my Nest was not showing any new data anymore in my Domoticz. The reason for that is, Google stopped the developer program “Works with Nest”. The new platform will be available by the end of this year. Till then we need a workaround to get our data.
My Domoticz is running the latest Version: 2020.1 on my Synology ds218. After some research on the internet I came across a Nest Api solution build by Roland Breedveld for a Raspberry Pi. You find all the code and the readme here:
To run the code on my Synology I needed to change some of the code and the setup.
Please follow the steps below to get the Nest Api working on your Synology:
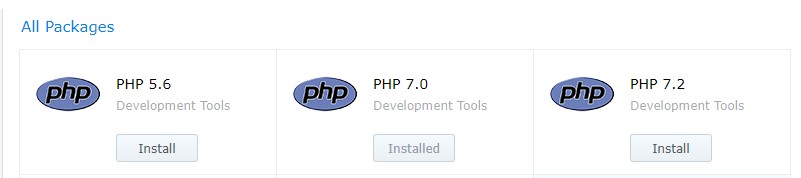
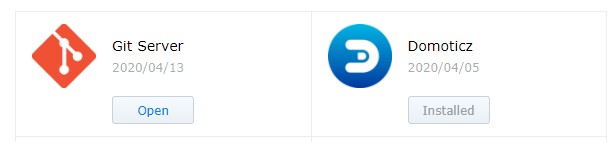
Before you start make sure have installed the PHP and the Git Server Package:
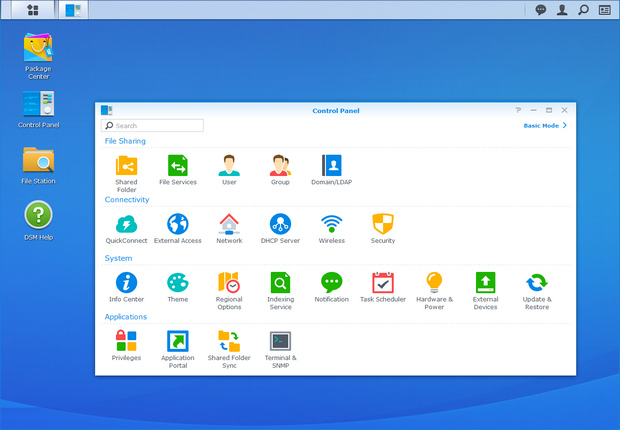
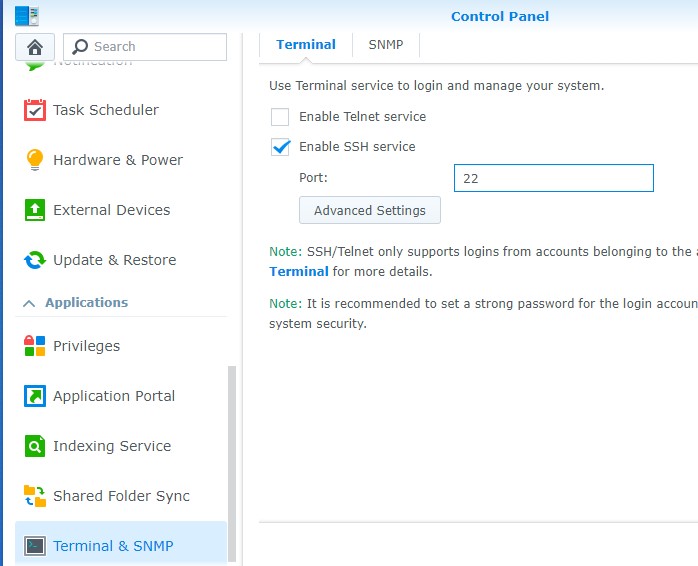
Enable SSH in your Synology Control Panel – Terminal & SNMP
Login in to your Synology with SSH, I’m using Bitwise SSH Client to connect to my Synology.
After you’re logged in, log in to Root
Sudo-i and Password
Installation
Change to your script location of your Domoticz(in my case and probally for most of the Synology users)
Copy nest.auth.php_example to nest.auth.php and change the issue-token and cookie in nest.auth.php to get both values take these steps: (thanks FilipDem for this info) READ THESE STEPS CAREFULLY !
Open a Chrome browser tab in Incognito Mode (or clear your cache).
Open Developer Tools (View/Developer/Developer Tools).
Click on Network tab. Make sure Preserve Log is checked.
One network call (beginning with iframerpc) will appear in the Dev Tools window. Click on it.
In the Headers tab, under General, copy the entire Request URL (beginning with https://accounts.google.com, ending with nest.com). This is your $issue_token.
In the Filter box, enter oauth2/iframe
Several network calls will appear in the Dev Tools window. Click on the last iframe call.
In the Headers tab, under Request Headers (be shure it's the request header not the other ones!!), copy the entire cookie value (include the whole string which is several lines long and has many field/value pairs - do not include the Cookie: prefix). This is your $cookies; make sure all of it is on a single line. Be shure, the cookie and token values are placed between '' and the row ends with a ;
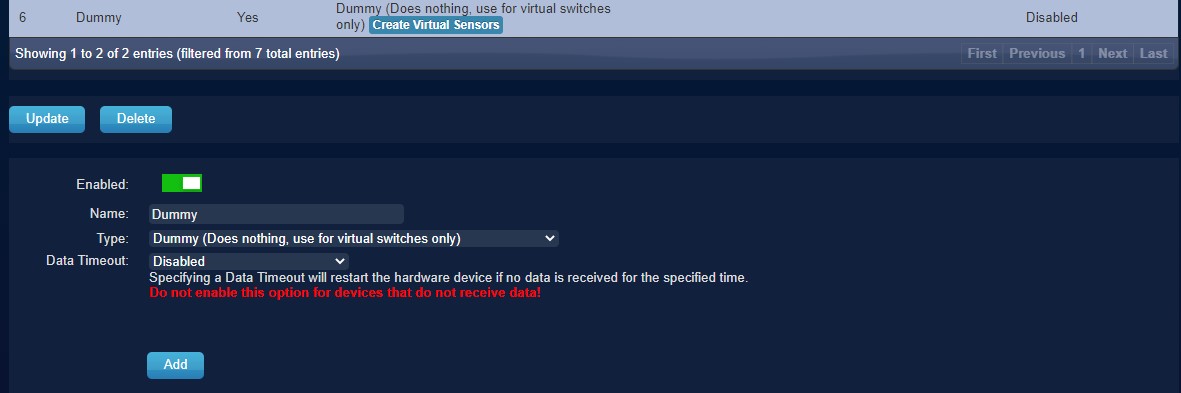
Create virtual Devices in Domoticz:
If you don't have created any Dummy Virtual Sensors before make you sure add the dummy Hardware first:
Click on create Virtual Sensors, to add all sensors as below:
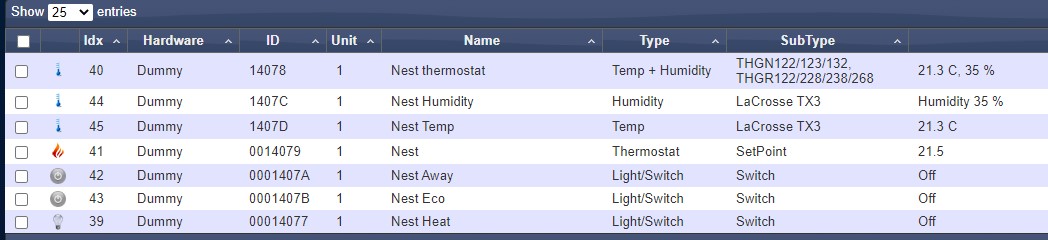
for Temp : Temperature LaCross TX3
for Hum : Humidity LaCross TX3
or if you want the combined virtual device for Tem and Hum :
for TempHum : Temp+Hum THGN122/123/132
for SetPoint : Thermostat SetPoint # I Named this device Nest, To acticate it easy from my iPhone with Siri
for ECOMode : a regular Light/Switch and change the icon tosomething nice
for AwayMode : a regular Light/Switch and change the icon tosomething nice
for Heat : a regular Light/Switch and change the icon tosomething nice
Nest Devices Configuration
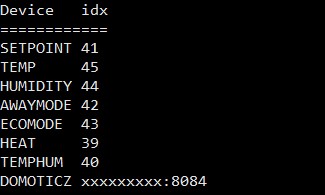
Move file nest_devices.cfg-example to nest_devices.cfg note the idx nrs, as find in the devices tab, and change them below in the nest_devices.cfg file.
Example: SETPOINT 41<<< change this as example for the SETPOINT to your idxremove or place a # for lines you don't want to use.
Domoticz => Your Domoticz server and port (8080;8084)
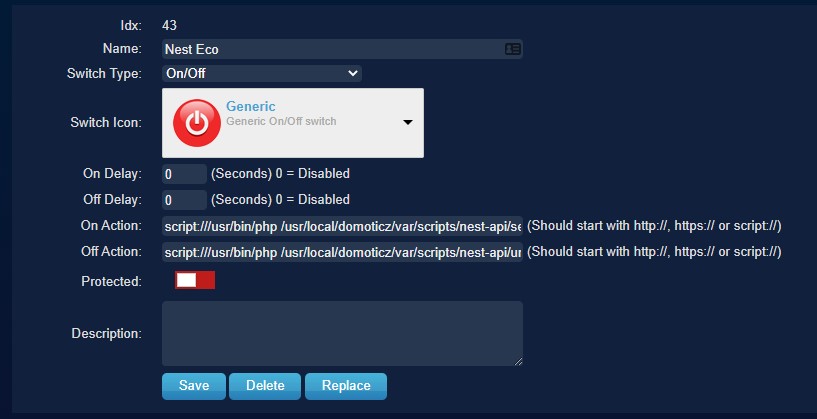
Edit in Domoticz the ECO Mode switch:
On Action: script:///usr/bin/php /usr/local/domoticz/var/scripts/nest-api /set_nest_eco_mode.php
Off Action: script:///usr/bin/php /usr/local/domoticz/var/scripts/nest-api /unset_nest_eco_mode.php
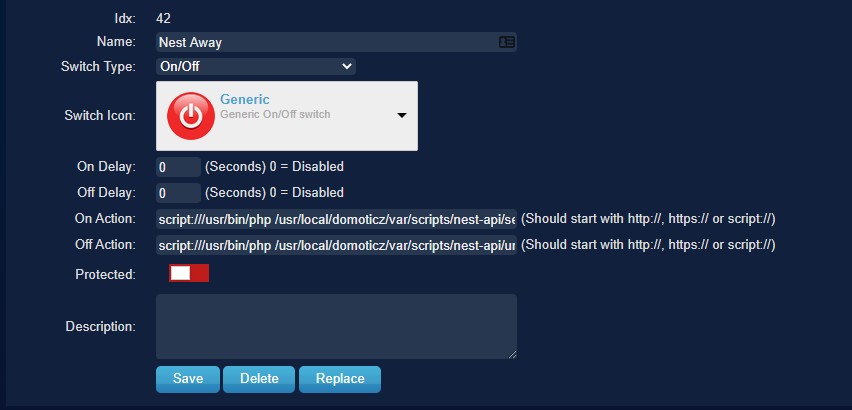
Edit in Domoticz the Away Mode switch:
On Action: script:///usr/bin/php /usr/local/domoticz/var/scripts/nest-api /set_nest_away_mode.php
Off Action: script:///usr/bin/php /usr/local/domoticz/var/scripts/nest-api /unset_nest_away_mode.php
Domoticz Events
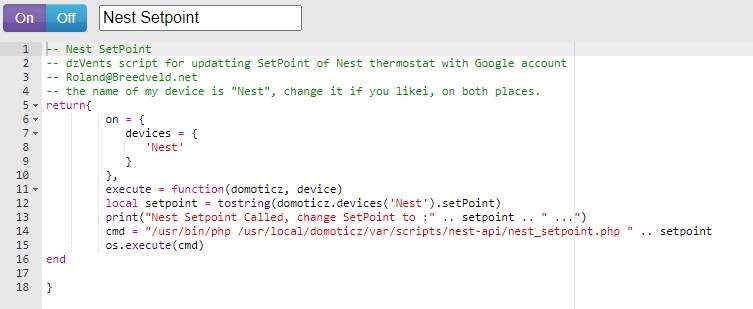
In the Domoticz event gui, create a new event->dzvents->device cut-and-paste the content of the example file dzVents_script_Nest_Setpoint.txt in it. My setpoint device is called "Nest", so you perhaps you need to change it. Better don't use spaces in the device names if you call them from dzvents event's. I had a couple of times problems with this, removing the spaces solved it.
Domoticz Settings
In the Domoticz configuration add 127.0.0.* and your ip (or range) to local networks.
Schedule
Add the following cron-entry, to get every 5 minutes the last values from Google: (crontab -e)
In the file get_nest.sh change the location to /usr/local/domoticz/var/scripts/nest-api(or to your Domiticz Directory)
You can create a schedule to run for every minute, but I don't know if Google has limitation's how much call's per hour are allowed, 5 minutes is save I think, also Domoticz stores it's data every 5 minutes, so it only effects the user interface. I you are using logging for a longer time you need to avoid the log-file became to big, by activate log-rotating:
Of course you can schedule it every minute, but I don't know if Google has limitation's how much call's per hour are allowed, 5 minutes is save I think, also Domoticz stores it's data every 5 minutes, so it only effects the user interface.
Log-Rotating
I you are using logging for a longer time you need to avoid the log-file became to big, by activate log-rotating:
If nest-api not is running as root change the create row to: create 640 user-name group-name
In case you do a 2nd schedule somewhere else, like in the Nest itself, they can conflict with each other when running exactly on the same time. This will result as a 5 minutes toggle of values or states, you can simple solve it to add a little delay in the cron:
If you get this error: PHP Fatal error: Uncaught exception 'UnexpectedValueException' with message 'Response to login request doesn't contain required access token. Response: {"error":"USER_LOGGED_OUT","detail":"No active session found."}' in /home/pi/nest-api/nest.class.php:1100
You have to regenerate the cookie and token again, see steps above, for some reason the token and cookie stopped working after running fine for 2 months in my case.
Errors
Check for common error message the original Readme
Most of the above blog corresponds to the original Readme, I only made the adjustments everywhere that where necessary for an installation on a Synology.
I'm happy that my Nest Thermostat is working again on my Domoticz, hopefully this blog helped you as well.
In a couple of weeks I will write a blog about how I get the data from Domoticz and load it into Azure and create Power BI Reports on it. Let me know in the comments if you're interested in such a blog.