
Control my Nest Thermostat on my Domoticz Server running on a Synology DiskStation
Control your Nest Thermostat in Domoticz
Normally I always write Azure related, but today I'm writing about something different, on how I can control my Nest Thermostat on my Domoticz Server (Home automation).
A while ago I have upgraded my Nest Thermostat to login with Google. What happened after the upgrade, my Nest was not showing any new data anymore in my Domoticz. The reason for that is, Google stopped the developer program “Works with Nest”. The new platform will be available by the end of this year . Till then we need a workaround to get our data.
My Domoticz is running the latest Version: 2020.1 on my Synology ds218. After some research on the internet I came across a Nest Api solution build by Roland Breedveld for a Raspberry Pi. You find all the code and the readme here:
To run the code on my Synology I needed to change some of the code and the setup.
Please follow the steps below to get the Nest Api working on your Synology:
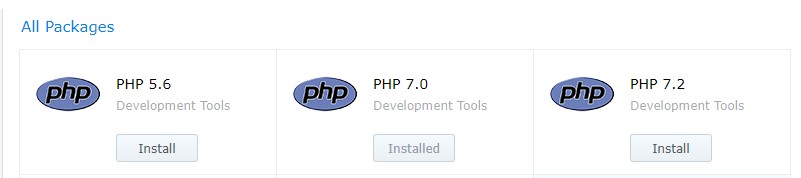
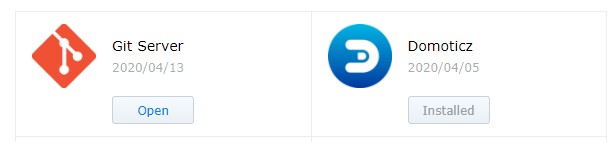
Before you start make sure have installed the PHP and the Git Server Package:
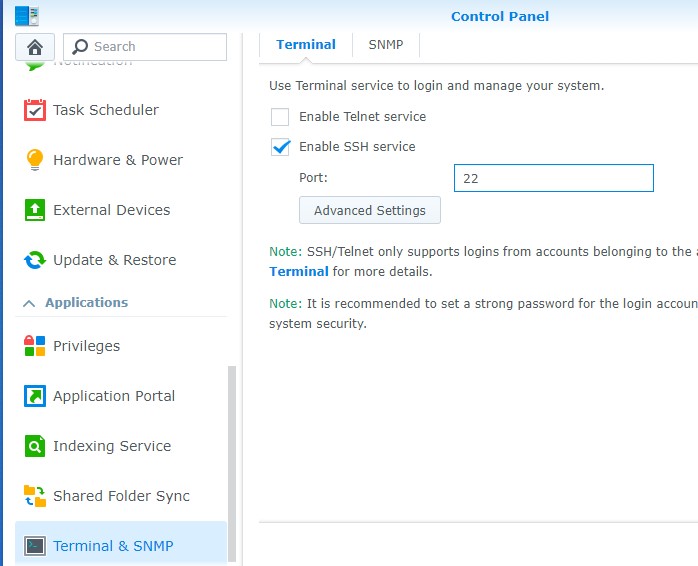
Enable SSH in your Synology Control Panel – Terminal & SNMP
Login in to your Synology with SSH, I’m using Bitwise SSH Client to connect to my Synology.
After you’re logged in, log in to Root
Sudo-i and Password

Installation
Change to your script location of your Domoticz(in my case and probally for most of the Synology users)
Cd /usr/local/domoticz/var/scripts
git clone https://github.com/rolandbreedveld/nest-api.git
Update
To update it to the latest version:
Cd /usr/local/domoticz/var/scripts/nest-api
git pull
Configuration
Copy nest.auth.php_example to nest.auth.php and change the issue-token and cookie in nest.auth.php
to get both values take these steps: (thanks FilipDem for this info)
READ THESE STEPS CAREFULLY !
- Open a Chrome browser tab in Incognito Mode (or clear your cache).
- Open Developer Tools (View/Developer/Developer Tools).
- Click on Network tab. Make sure Preserve Log is checked.
- In the Filter box, enter issueToken
- Go to https://home.nest.com, and click Sign in with Google. Log into your account.
- One network call (beginning with iframerpc) will appear in the Dev Tools window. Click on it.
- In the Headers tab, under General, copy the entire Request URL (beginning with https://accounts.google.com, ending with nest.com). This is your $issue_token.
- In the Filter box, enter oauth2/iframe
- Several network calls will appear in the Dev Tools window. Click on the last iframe call.
- In the Headers tab, under Request Headers (be shure it's the request header not the other ones!!), copy the entire cookie value (include the whole string which is several lines long and has many field/value pairs - do not include the Cookie: prefix). This is your $cookies; make sure all of it is on a single line.
Be shure, the cookie and token values are placed between '' and the row ends with a ;
Create virtual Devices in Domoticz:
If you don't have created any Dummy Virtual Sensors before make you sure add the dummy Hardware first:
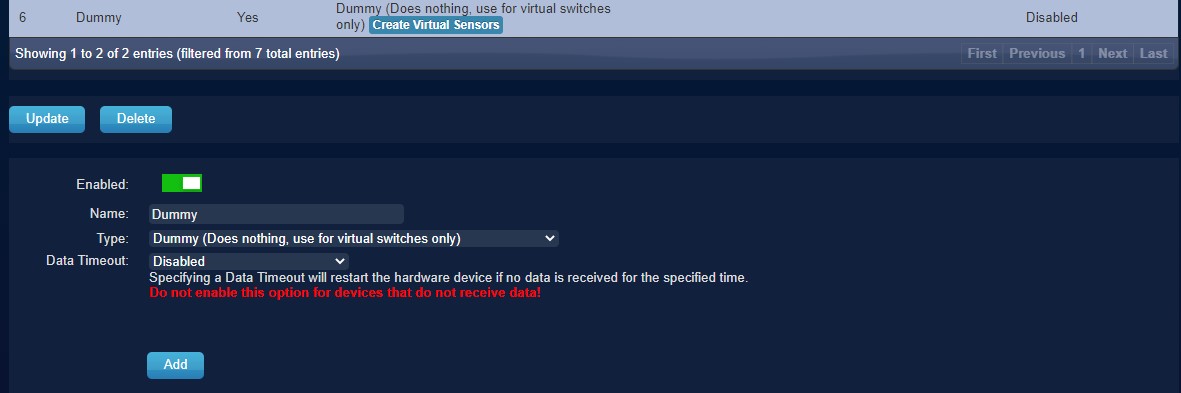
Click on create Virtual Sensors, to add all sensors as below:
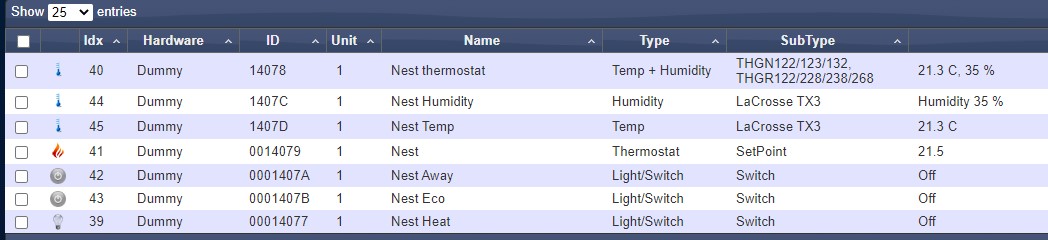
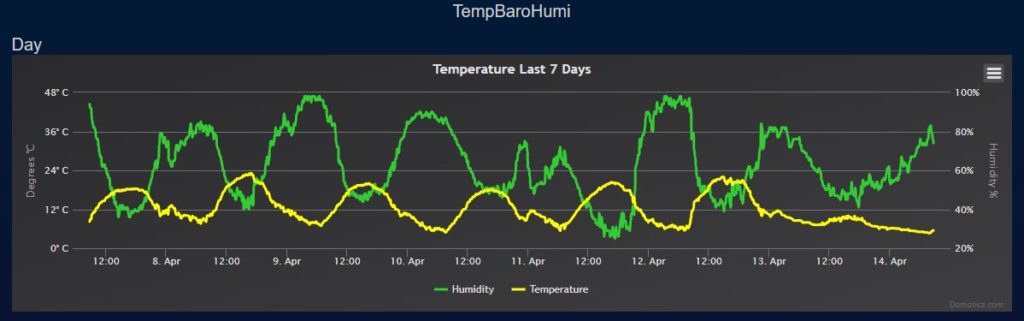
- for Temp : Temperature LaCross TX3
- for Hum : Humidity LaCross TX3
or if you want the combined virtual device for Tem and Hum :
- for TempHum : Temp+Hum THGN122/123/132
- for SetPoint : Thermostat SetPoint # I Named this device Nest, To acticate it easy from my iPhone with Siri
- for ECOMode : a regular Light/Switch and change the icon tosomething nice
- for AwayMode : a regular Light/Switch and change the icon tosomething nice
- for Heat : a regular Light/Switch and change the icon tosomething nice
Nest Devices Configuration
Move file nest_devices.cfg-example to nest_devices.cfg note the idx nrs, as find in the devices tab, and change them below in the nest_devices.cfg file.
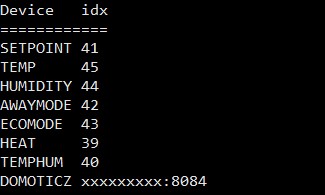
Example: SETPOINT 41<<< change this as example for the SETPOINT to your idxremove or place a # for lines you don't want to use.
Domoticz => Your Domoticz server and port (8080;8084)
Edit in Domoticz the ECO Mode switch:
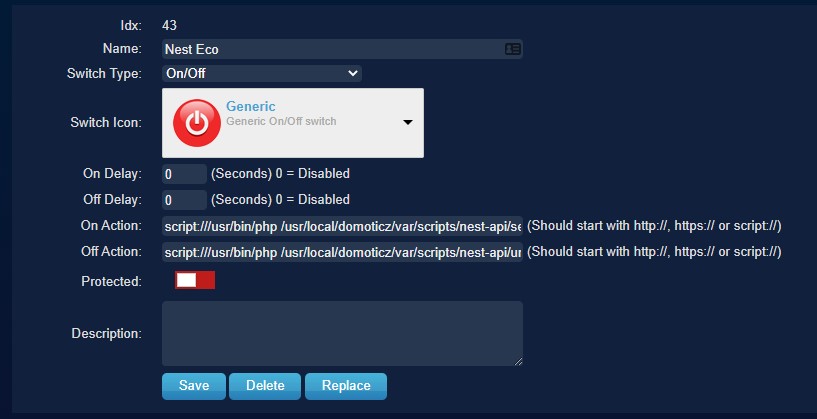
On Action: script:///usr/bin/php /usr/local/domoticz/var/scripts/nest-api /set_nest_eco_mode.php
Off Action: script:///usr/bin/php /usr/local/domoticz/var/scripts/nest-api /unset_nest_eco_mode.php
Edit in Domoticz the Away Mode switch:
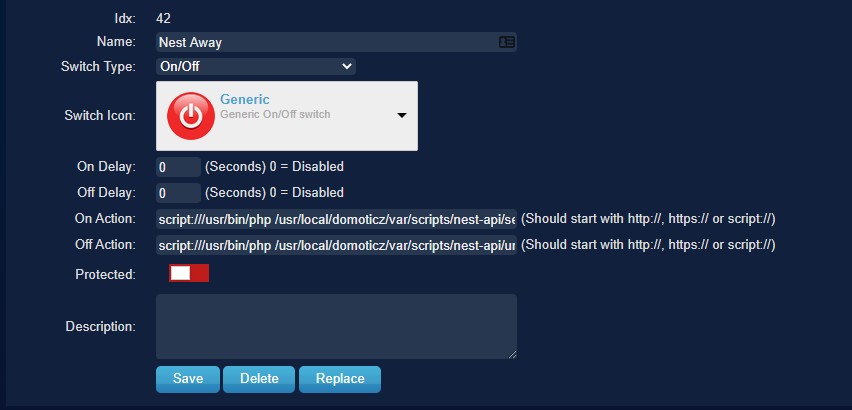
On Action: script:///usr/bin/php /usr/local/domoticz/var/scripts/nest-api /set_nest_away_mode.php
Off Action: script:///usr/bin/php /usr/local/domoticz/var/scripts/nest-api /unset_nest_away_mode.php
Domoticz Events
In the Domoticz event gui, create a new event->dzvents->device
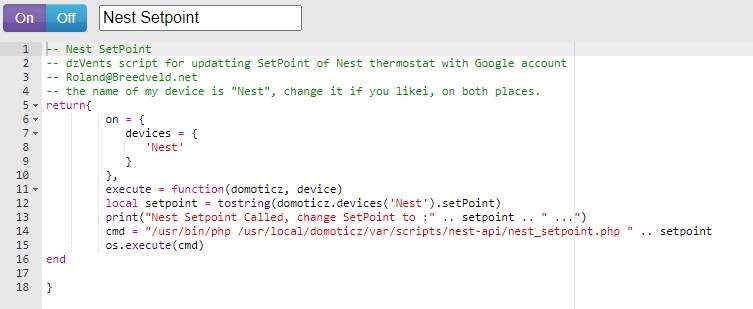
cut-and-paste the content of the example file dzVents_script_Nest_Setpoint.txt in it.
My setpoint device is called "Nest", so you perhaps you need to change it.
Better don't use spaces in the device names if you call them from dzvents event's.
I had a couple of times problems with this, removing the spaces solved it.
Domoticz Settings
In the Domoticz configuration add 127.0.0.* and your ip (or range) to local networks.

Schedule
Add the following cron-entry, to get every 5 minutes the last values from Google: (crontab -e)
*/5 * * * * root /usr/local/domoticz/var/scripts/nest-api/get_nest.sh >/dev/null 2>&1
Schedule with Logging enabled
*/5 * * * * root /usr/local/domoticz/var/scripts/nest-api/get_nest.sh >/var/log/nest-api.log 2>&1
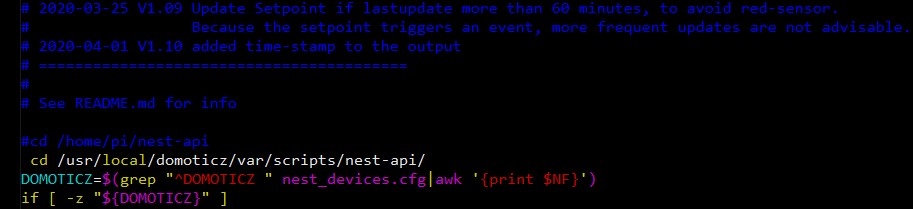
In the file get_nest.sh change the location to /usr/local/domoticz/var/scripts/nest-api(or to your Domiticz Directory)
You can create a schedule to run for every minute, but I don't know if Google has limitation's how much call's per hour are allowed, 5 minutes is save I think, also Domoticz stores it's data every 5 minutes, so it only effects the user interface.
I you are using logging for a longer time you need to avoid the log-file became to big, by activate log-rotating:
Of course you can schedule it every minute, but I don't know if Google has limitation's how much call's per hour are allowed, 5 minutes is save I think, also Domoticz stores it's data every 5 minutes, so it only effects the user interface.
Log-Rotating
I you are using logging for a longer time you need to avoid the log-file became to big, by activate log-rotating:
- create a file: /etc/logrotate.d/nest-api :
/var/log/nest-api.log {
weekly
missingok
rotate 52
compress
notifempty
create 640 root root
sharedscripts
} - If nest-api not is running as root change the create row to:
create 640 user-name group-name
In case you do a 2nd schedule somewhere else, like in the Nest itself, they can conflict with each other when running exactly on the same time.
This will result as a 5 minutes toggle of values or states, you can simple solve it to add a little delay in the cron:
- */5 * * * * sleep60; root /usr/local/domoticz/var/scripts/nest-api/get_nest.sh >/dev/null 2>&1
If you get this error:
PHP Fatal error: Uncaught exception 'UnexpectedValueException' with message 'Response to login request doesn't contain required access token. Response: {"error":"USER_LOGGED_OUT","detail":"No active session found."}' in /home/pi/nest-api/nest.class.php:1100
You have to regenerate the cookie and token again, see steps above, for some reason the token and cookie stopped working after running fine for 2 months in my case.
Errors
Check for common error message the original Readme
Most of the above blog corresponds to the original Readme, I only made the adjustments everywhere that where necessary for an installation on a Synology.
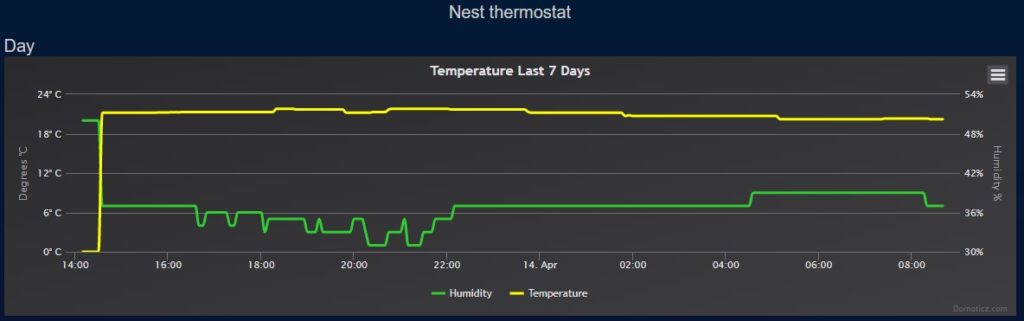
I'm happy that my Nest Thermostat is working again on my Domoticz, hopefully this blog helped you as well.
In a couple of weeks I will write a blog about how I get the data from Domoticz and load it into Azure and create Power BI Reports on it. Let me know in the comments if you're interested in such a blog.
- Fabric Metadata Driven Framework July 2026 Release Notes

- Reassigning Microsoft Fabric Capacities in Bulk: Don’t Let an Expiring Trial Catch You by Surprise
- Bringing Column-Level Lineage from Microsoft Fabric to Microsoft Purview with FMD
- My first experience: Building a Fabric App
- Fabric Metadata Driven Framework update May 2026


Feel free to leave a comment
7 Comments
Leave a Reply
Discover more from Erwin | Data & Intelligence
Subscribe to get the latest posts sent to your email.
Jammer genoeg krijg ik je script niet werkend in Domoticz. Alle stappen zorgvuldig gevolgd, maar krijg geen waarden in Domoticz. Logfile (in domoticz) toont ook niets anders dan 1 entry ” dzVents: Write file: /usr/local/domoticz/var/scripts/dzVents/generated_scripts/NestWoonkamer Setpoint.lua”
Mijn Cookie ziet er net iets anders uit; misschien ivm 2-factor authentication. Het is echt wel zeker de juiste cookie, maar begint met $cookies = ‘__Secure-3PSID=6(veeltekst) .; __Secure-3PAPISID=D(veeltekst) ‘;
Waar kan ik beginnen met debuggen of uitzoeken of het wel of niet werkt?
Hoi,
Heb net even de stappen doorlopen om te kijken of het er bij mij nu anders uit ziet. Het lua script ziet erbij mij als volgt uit:
return{
on = {
devices = {
‘Nest’
}
},
execute = function(domoticz, device)
local setpoint = tostring(domoticz.devices(‘Nest’).setPoint)
print(“Nest Setpoint Called, change SetPoint to :” .. setpoint .. ” …”)
cmd = “/usr/bin/php /usr/local/domoticz/var/scripts/nest-api/nest_setpoint.php ” .. setpoint
os.execute(cmd)
end
}

Voorbeeld van het token
En ik heb ook 2 factor aan staan

Ik weet eerlijk gezegd niet waar het fout is gegaan. Heb je overal NEST aangepast naar NestWoonkamer?
Het lijkt erop dat het cookie elke drie maanden wordt vernieuwd. Is dat nog te voorkomen?
Hi Marcel,
Nee, dat is helaas niet te voorkomen dat ligt aan Google. Hopelijk komt er gauw een betere functionaliteit.
Hi Erwin,
Even een hele late reactie – de vervolgblog over hoe je van Domoticz naar Azure de data brengt is er niet meer gekomen geloof ik toch? Kun je globaal schetsen wat je gedaan hebt?
Ik zat zelf te denken aan een InfluxDB-container, maar mooier zou zijn om een EventHubs of IoT Hubs connectie te maken (aangezien Domoticz zelf ook Google PubSub ondersteunt voor data push)
Koos,
Inderdaad helemaal vergeten om daar een post van te maken, ik gebruik gewoon Azure Data Factory om de data van domoticz op te halen.
Via onderstaande string kan je de data die je verzameld hebt van het weer, energie(p1), zonnepanelen etc etc mooi combineren in een PowerBI Rapport
/json.htm?type=graph&sensor=@{dataset().DomoticzSource}&idx=@{dataset().DomoticzId}&range=@{dataset().Period_day_year}
DomoticzId= Device Id in Domoticz
DomoticzSource = Counter/Rain/Temp afhankelijk van je gekozen Device
Period_day_year = Day/Month/Year
Vervolgens haal ik deze data op naar een Azure SQL database en haal ik deze data elke dag op en merge ik deze in de reeds opgehaalde data.
De optie met Event Hub, heb ik niet onderzocht omdat RealTime niet noodzakelijk was, maar zou idd wel heel erg mooi zijn.
Ik zet het blog even weer op mijn todo lijstje. Bij verdere vragen weet je me te vinden.
Ah, natuurlijk. Pull-based is ook nog een optie – helemaal niet aan gedacht in deze.
Event Hub is niet zomaar mogelijk – de enige HTTP push die Domoticz standaard ondersteunt is basic authentication (niet de certificaat of de SAS-tokens die EH vereist).
Had ook zitten kijken naar MQTT doorsturen (naar IoT Hub dan), maar dat wordt eigenlijk alleen voor het aansluiten van Zigbee en ZWave gebruikt, niet voor de meer “native” plugins als P1, SolarEdge, Toon e.d.
Voor nu ga ik je pull-based variant eerst eens proberen, en wellicht in de toekomst een extensie schrijven voor Domoticz-naar-EventHubs of IoT Hubs.
Thanks voor de tip!