
Create capacity for Microsoft Fabric
Microsoft Fabric Capacity
Since the first of June 2023, we can create Fabric capacities in Azure. This are currently the Pay as You go pricing, later this year the Azure Reservation will follow. OneLake storage pricing is comparable to Azure ADLS (Azure Data Lake Storage) pricing and is not included in the price below. These prices are prices in the West-Europe region, prices can be different across regions.

Note: As you can see, the F1024 and F2028 are not having the correct prices, it should be 2 or 4 x F512. The error is already is report to the Fabric Team.
Read the announcement below:
Announcing Microsoft Fabric capacities are available for purchase | Microsoft Fabric Blog
Microsoft Fabric Capacity is a distinct pool of resources allocated to Microsoft Fabric that resides on a tenant. The size of the capacity determines the amount of computation power your organization gets.
Microsoft Fabric has an array of capacities that you can buy. The capacities are split into SKU's. Each SKU provides a different amount of computing power, measured by its Capacity Unit (CU) value.
Creating Fabric Capacity in Azure
- Search for the Fabric Capacity in the Azure Marketplace.
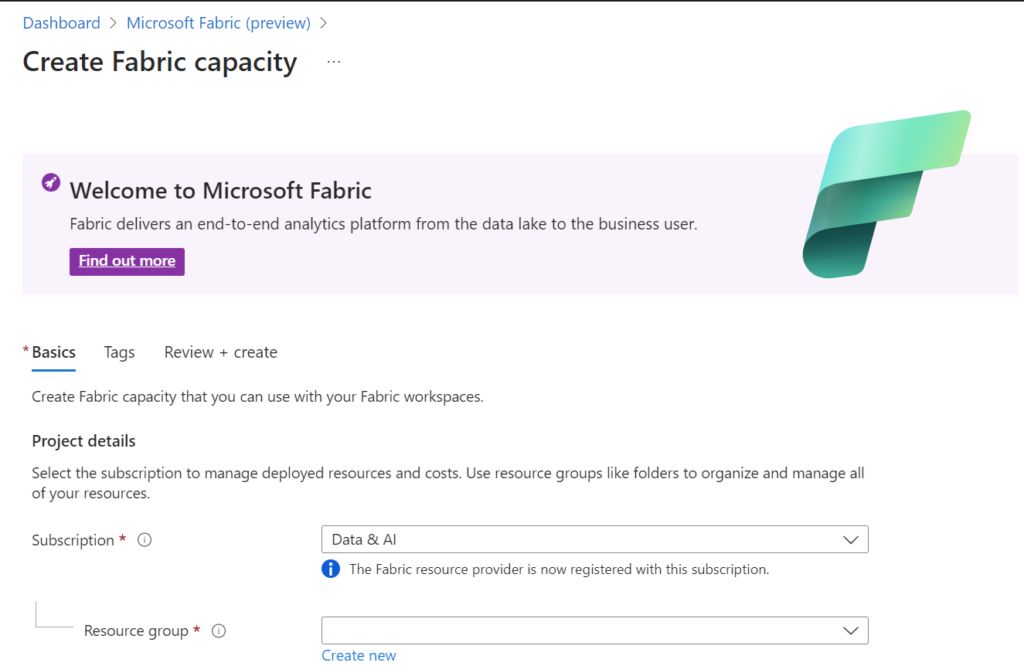
- Select the appropriate Subscription and resource group. You can move the Fabric capacity to another Resource Group later if needed.

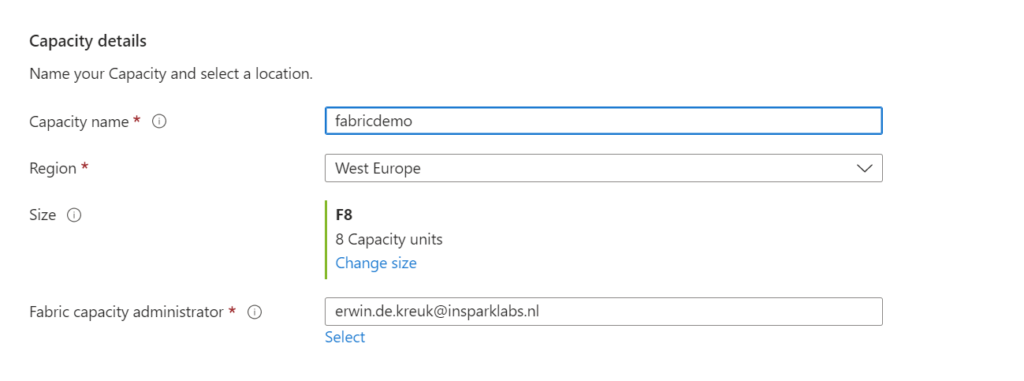
- Provide a name for the capacity.
- Define the region for the capacity.
- Choose the desired size, starting from F2. F64 is equivalent to a Power BI Premium capacity. You can learn more on this page.
- Assign a Fabric capacity Administrator.
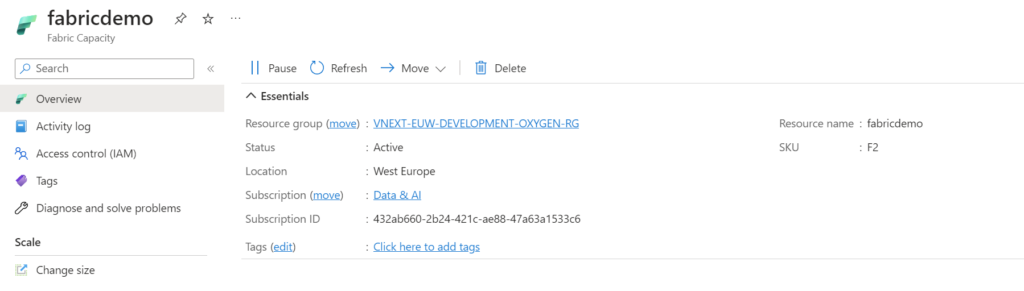
- Click on "Create" to initiate the capacity creation process. Once created, you will see the relevant information on the screen.
Assign capacity in Microsoft Fabric
After creating the Fabric capacity, you need to assign it to a Workspace by following these steps:
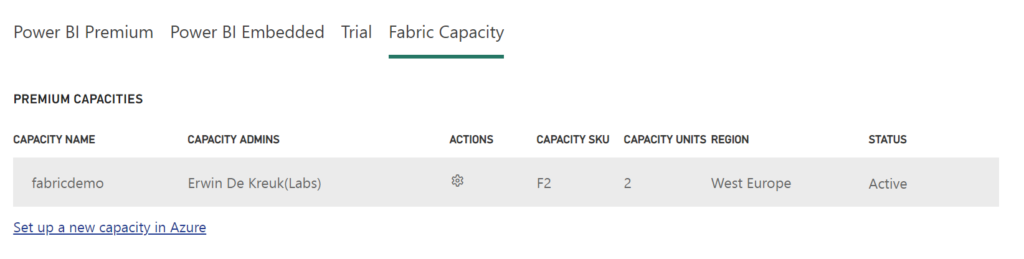
- Open the Microsoft Fabric admin portal.
- Select the capacity option on the right side.
- Locate the recently created capacity in the list.

Assign capacity to a Workspace
The last step is to assign the capacity to a Workspace.
- On the Workspace level, click on settings.
- Go to the Premium tab and select the Fabric capacity.
- Define the correct License capacity for the Fabric capacity.
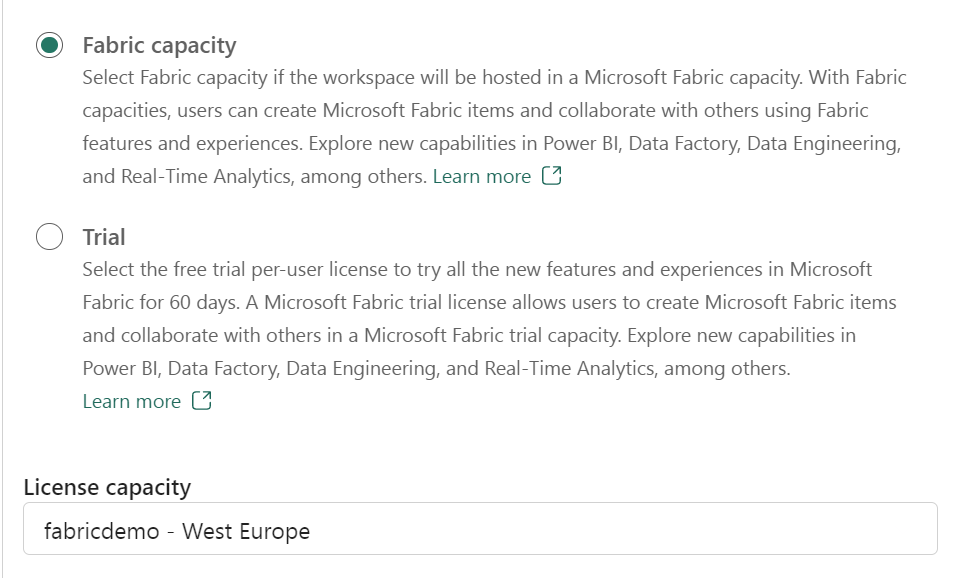
Select the Fabric Capacity and define the correct License capacity to it. That's all, you are now using the new capacity.
Capacity Pause/Resume
With the Fabric capacity set up, you can take advantage of the Pause/Resume feature, which allows you to temporarily halt and resume the capacity, making it useful for development and testing purposes. However, please note that this option will not work if you purchase Azure Reservation in the future.
Microsoft Fabric app
To monitor usage and related to Microsoft Fabric capacities, you can use the Microsoft Fabric utilization and metrics app.
To install the Microsoft Fabric Capacity Metrics app for the first time, follow these steps:
- Select one of these options to get the app from AppSource:Go to AppSource > Microsoft Fabric Capacity Metrics and select Get it now.In Microsoft Fabric:
- Select Apps.
- Select Get apps.
- Search for Microsoft Fabric.
- Select the Microsoft Fabric Capacity Metrics app.
- Select Get it now.
- When prompted, sign in to AppSource using your Microsoft account and complete the registration screen. The app takes you to Microsoft Fabric to complete the process. Select Install to continue.
- In the Install this Power BI app window, select Install.
- Wait a few seconds for the app to install.
It's a pretty simple process to set it up.
Documentation
If you have any questions, I'd love to hear them.
More information about Microsoft Fabric can be found at:
Microsoft Fabric Content Hub
- Fabric Metadata Driven Framework July 2026 Release Notes

- Reassigning Microsoft Fabric Capacities in Bulk: Don’t Let an Expiring Trial Catch You by Surprise
- Bringing Column-Level Lineage from Microsoft Fabric to Microsoft Purview with FMD
- My first experience: Building a Fabric App
- Fabric Metadata Driven Framework update May 2026


Feel free to leave a comment
Discover more from Erwin | Data & Intelligence
Subscribe to get the latest posts sent to your email.
0 Comments