Custom comments in Azure Synapse Analytics
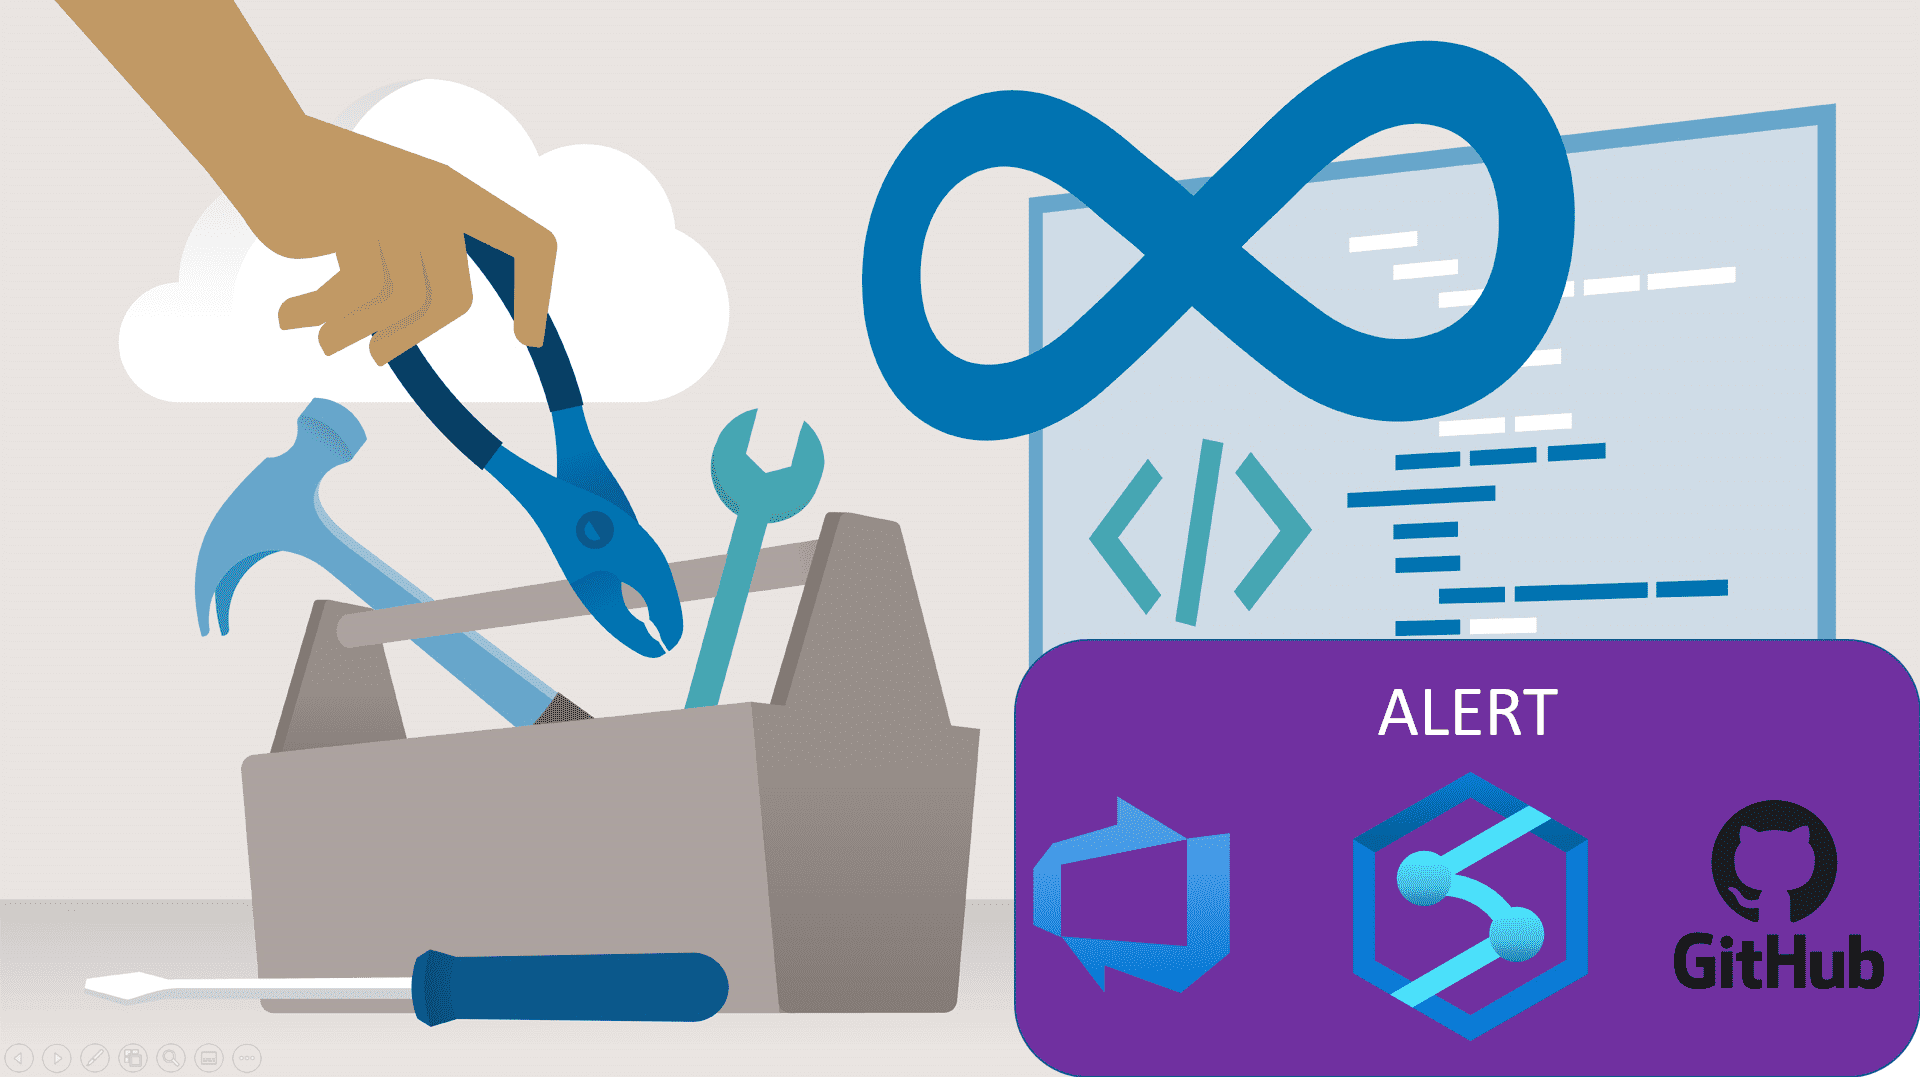
DevOps
Add custom comments to your Azure DevOps and Github commits
Finally
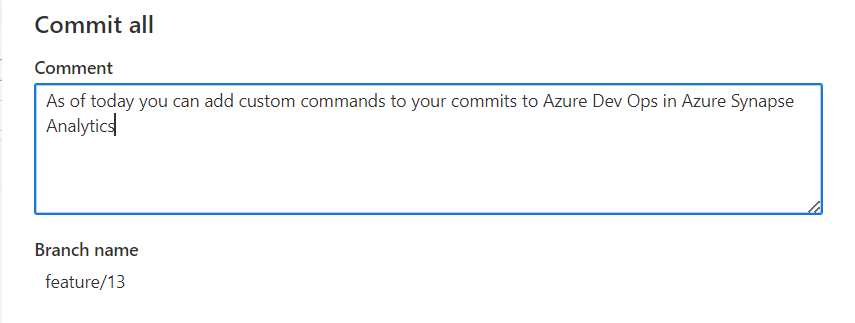
Finally and secretly hidden, we can now add a Comment to our commits in Azure Synapse Analytics and Azure Data Factory to Azure Dev Ops.
How do you activate this custom comment option in your existing environment. Read below.
Existing environment
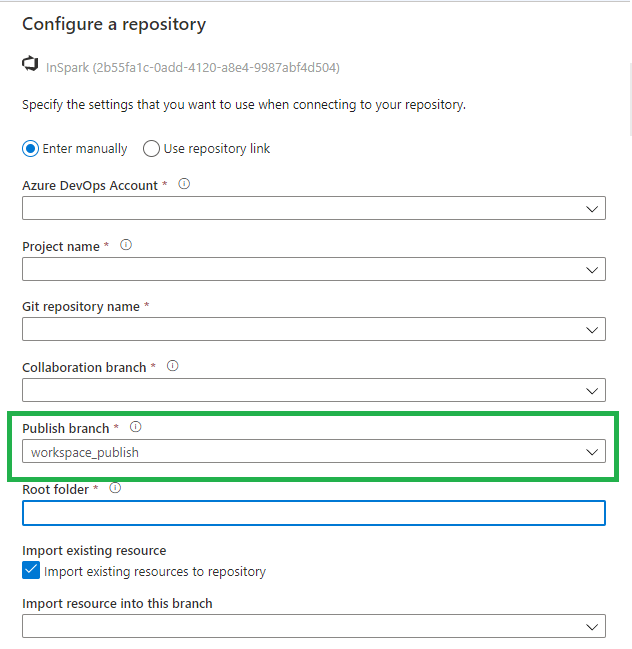
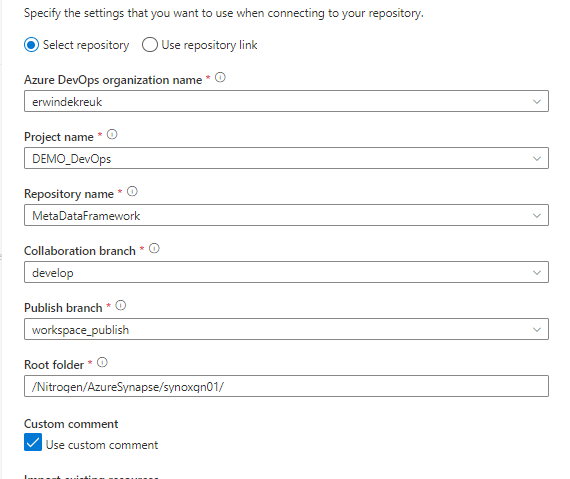
In Azure Synapse Analytics, go to the Git Configuration in the Management Activity Hub.
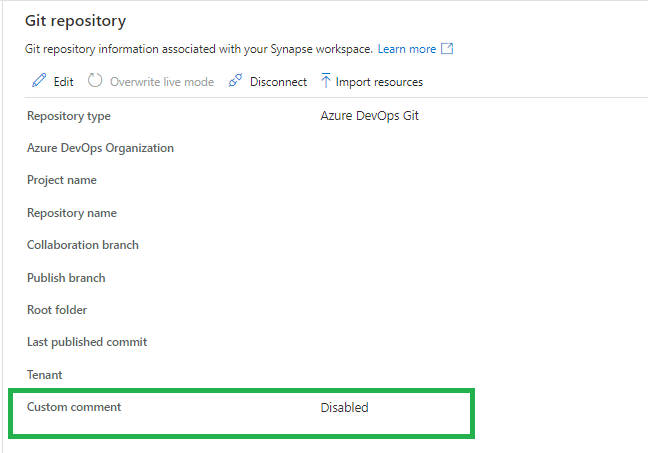
If the custom command is not enabled, you will see that this new feature is available.
When you click on edit you can enable this new feature. Make sure you're are allowed to make changes to your current branch. Otherwise create a new feature and make the change in this feature before you merge(Pull request) it into your develop branch.
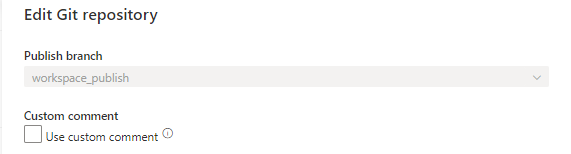
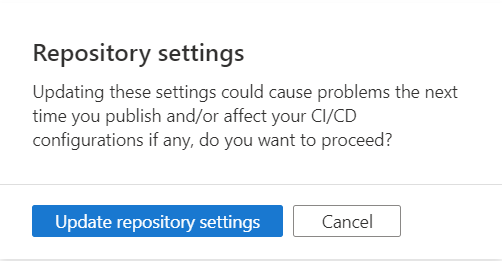
You will get a warning, this is mainly because you're updating a configuration file.
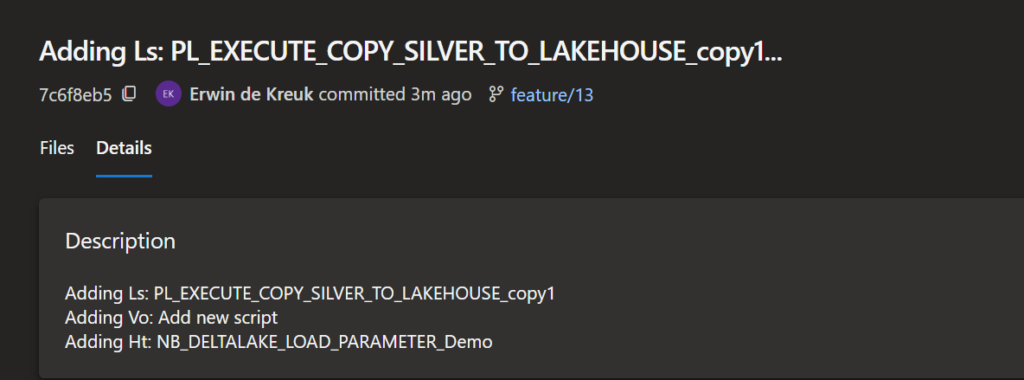
Once the option is enables, you will have the possibility to add a custom command on your commit. Which can be very useful.
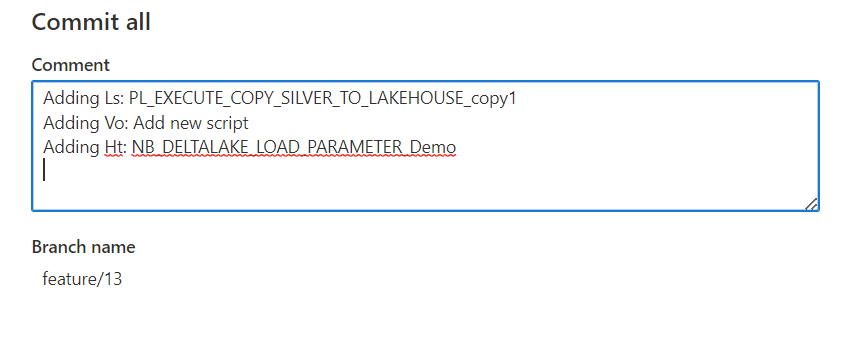
This message will be pushed to Azure DevOps as well and can be found on your commit, including the custom commands you added.

New environment
The new option is now also available when you connect Azure DevOps for the first time, just enable the option in the configuration pane.
Azure DevOps
You can enable this option also directly in Azure DevOps by adding the following option in enableGitComment":true in de publish_config.json file, which is located in the root folder of you Azure Synapse repository.
Azure Data Factory
The above steps are working the same in Azure Data Factory
Github
Custom comments are also available in Github, works the same as Azure DevOps
Remarks
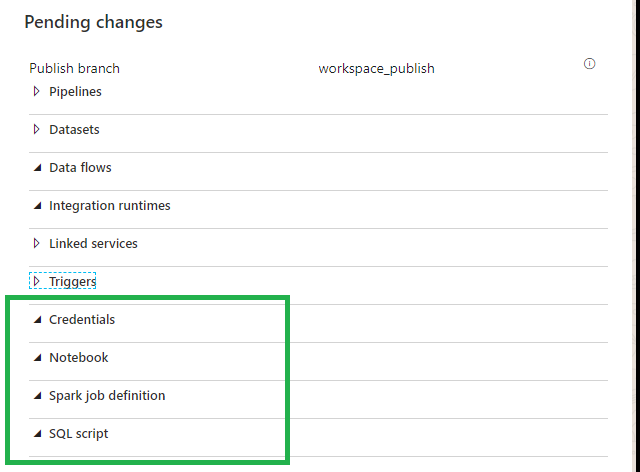
The custom comment option is only working when you apply the Commit All button, it is not working on a single artifact commit.
Have fun with it and let me now your findings!
It's a fairly simple process, but you just need to know it. And it will ultimately makes the collaboration with your team members much easier.
If you have any questions regarding the above, please let me know.
Documentation: