Azure Synapse Pause and Resume SQL Pool

Azure Synapse Pause and Resume SQL Pool

Pause or Resume your Dedicated SQL Pool in Azure Synapse Analytics

Azure Synapse Analytics went GA in beginning of December 2020, with Azure Synapse we can now also create a Dedicated SQL Pool(formerly Azure SQL DW). Please read this document to learn what a Dedicated SQL Pool is. This article describes how to Pause or Resume a SQL Pool within Azure Synapse Analytics. A SQL Pool(Former Azure SQL DW) linked to a SQL (Logical) Server has a slightly different approach.

A SQL Pool is a MPP Database (short for massively parallel processing) and has a different approach of loading data but also different kind of pricing. This are details for another Blogpost.


Azure Synapse Dedicated SQL Pool

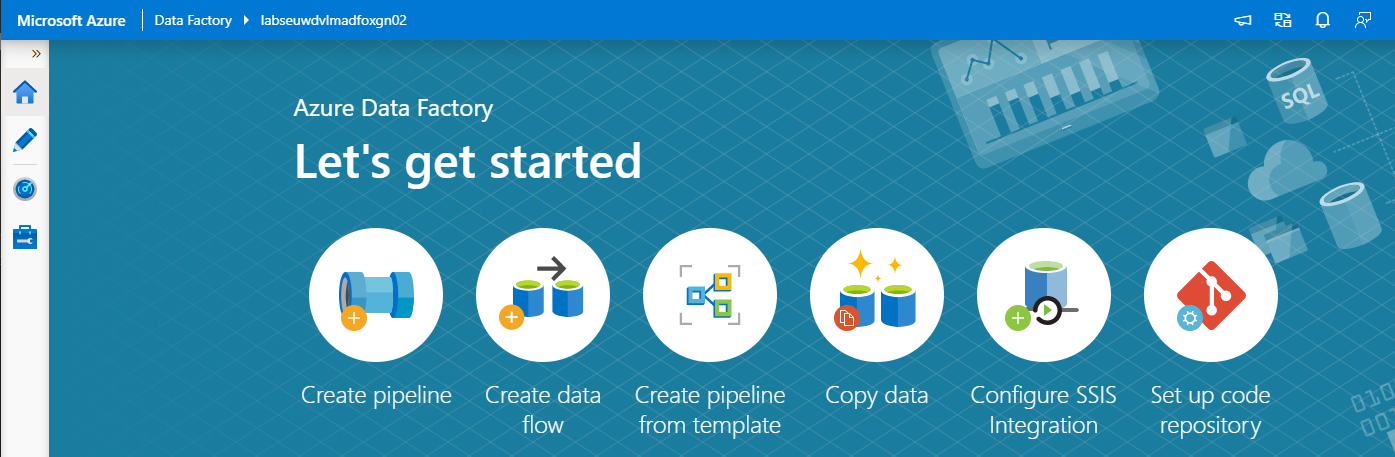
In this article, we are going to build a Synapse Pipeline which will call a REST API. The concept is based on an earlier post about Analysis Services:  Use Global Parameters to Suspend and Resume your Analysis Services in ADF.

A SQL Pool can have different statuses:

  • Pausing: SQL Pool is Pausing and we cannot change the status.
  • Resuming: SQL Pool is Resuming, the SQL Pool starting and during this  process and we cannot change the status.
  • Scaling: SQL Pool is Scaling, the SQL Pool is scaling to a different compute level and during this  process we cannot change the status.
  • Paused: SQLPool is Paused, we can now change the status.
  • Online: SQLPool is Online, we can now change the status.

To allow the Synapse workspace to call the REST API we need to give the Synapse workspace access to the SQL Pool. In the Access control (IAM) of the SQL Pool assign the contributor role to your Synapse Workspace.

Build Pipeline

Create a new Pipeline with the name PL_ACT_PAUSE_SQLPOOL

Add the following Parameters to the Pipeline:

Azure Synapse Dedicated SQL Pool Parameter

Above are the generic Parameters used within the Pipeline.

Action:   PAUSE or RESUME

WaitTime: Wait time in seconds before the Pipeline will finish

WaitTimeUntil: Wait time in seconds for the retry process

Synapse_ResourceGroupName: Name of the ResourceGroup of the used Synapse Workspace

SynapseWorkspace: SynapseWorkspace

SynapseDedicatedSQLPool: Name of the dedicated SQL Pool

SubsriptionId: SubscriptionId of Synapse Workspace

Until Activity

We can only change the status when the SQL Pool is Paused or Online That’s why we need to add  an Until activity to start the Pipeline. It executes a set of activities in a loop until the condition associated with the activity evaluates to true.

Azure Synapse Until

With this activity we can check the status of the SQL Pool and wait until it becomes Paused or Online. Let me explain how this works.

Web Activity

Within the Until Activity we need to create a new Web Activity. A Web Activity can be used to call a custom REST API endpoint from a Synapse Data pipeline.

Name = Check for changed SQLPool Status

URL= https://management.azure.com/subscriptions/XXX/resourceGroups/XXX/providers/Microsoft.Synapse/workspaces/XXX/sqlPools/XXX/?api-version=2019-06-01-preview

The  <xxx> we need to replace with the Pipeline Parameters. The final Result will be:

https://management.azure.com/subscriptions/@{pipeline().parameters.SubscriptionID}/resourceGroups/@{pipeline().parameters.Synapse_ResourceGroupName}/providers/Microsoft.Synapse/workspaces/@{pipeline().parameters.SynapseWorkspace}/sqlPools/@{pipeline().parameters.SynapseDedicatedSQLPool}/?api-version=2019-06-01-preview

Method = GET

Resource =https://management.azure.com/

Azure Synapse Web Activity

Once we have created the Web Activity, we can define the expression for the Until Activity.

Azure Synapse Until expresssion

The Pipeline can only continue when the status is Paused or Online and not one of the other statuses. That’s the reason we need to add these 2 two statuses to check for.

Expression: @or(bool(startswith(activity(‘Check for changed SQLPool Status’).Output.Properties.status,’Paused’)),Bool(startswith(activity(‘Check for changed SQLPool Status’).Output.Properties.status,’Online’)))

Time out: 0.00:20:00

The Until Activity will only continue, when the status from the above Web Activity output is Paused or Online, this can take a while and we don’t want to execute the Web Activity every time. That’s why we add a Wait Activity.

Wait Activity

A Wait Activity  waits for the specified period of time before continuing with execution of subsequent activities. Within the Wait Activity add an expression from above parameters for Wait time seconds.

Azure Synapse Wait Activity

After the Web Activity, Azure Synapse waits in this case 30 seconds to check if the status has changed before it will check again.

Azure Synapse Until inside

Check for the SQL Pool Status

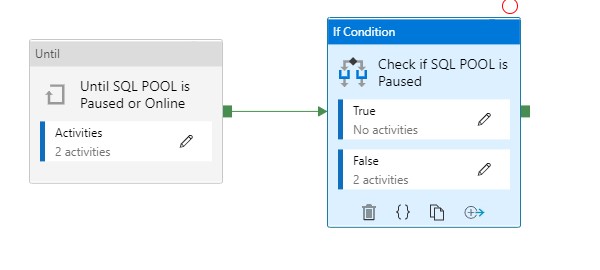
To check if the SQL Pool is paused, we’re adding an If Condition Activity (Name: Check if SQL POOL is Paused)

Azure Synapse Paused

Add an Expression on the If Condition Activity @bool(startswith(activity(‘Check for changed SQLPool Status’).Output.Properties.status,’Paused’))

This expression will check if the SQL Pool is Paused or not. In this situation we want to Pause our SQL Pool, to Pause the SQL Pool we need to add as  Activity for pausing(see below) to False. In case the SQL Pool is already Paused we do nothing(True).

Azure Synapse If inside

The following settings are set for the Web Activity:

URL: https://management.azure.com/subscriptions/XXX/resourceGroups/XXX/providers/Microsoft.Synapse/workspaces/XXX/sqlPools/XXX/{Action}?api-version=2019-06-01-preview

The  <xxx> we need to replace with the Pipeline Parameters. The final Result will be:

https://management.azure.com/subscriptions/{pipeline().parameters.SubscriptionID}/resourceGroups/{pipeline().parameters.Synapse_ResourceGroupName}/providers/Microsoft.Synapse/workspaces/{pipeline().parameters.SynapseWorkspace}/sqlPools/{pipeline().parameters.SynapseDedicatedSQLPool}/@{pipeline().parameters.Action}?api-version=2019-06-01-preview

It is almost the same URL but we have to add the action option @{pipeline().parameters.Action} 

Method = Post

Header = {“Nothing”:”Nothing”}

Resource =https://management.azure.com/

Add a Wait Activity but this time with a different parameter @pipeline().parameters.WaitTime, the purpose of this activity is to wait a period before we start ingestion data(just to be sure the SQL Pool in online)

Create Pipeline to Resume your SQL Pool

Clone your PL_ACT_PAUSE_SQLPOOL and rename it to PL_ACT_RESUME_SQLPOOL. Change your action Parameter to “Online”.

Within the IF Condition move the Web Activity Pause SQL Pool and the Wait Activity  from False to True and rename to Resume SQL Pool.

You have now learned how to Pause and Resume your SQL Pool Dynamically with the use of Parameters. Both Pipelines can be easily transferred to different customers.

Please feel free to download the Pipeline code here

MetaData

If you’re already using a database where you store your Meta Data, then you have also the possibility to store the necessary parameters in the database. The only thing you need to do is adding a Lookup Activity to get the parameters from your database(and replace the parameters with the output from the lookup activity)

Azure Synapse MetaData

A SQL Pool(Former SQL DW)

A SQL Pool(Former SQL DW) linked to a SQL (Logical) Server has a slightly different approach, use the settings below to create a Pipeline to Pause or Resume.

Action:   PAUSE or RESUME

WaitTime: Wait time in seconds before the Pipeline will finish

WaitTimeUntil: Wait time in seconds for the retry process

SQLServer_ResourceGroupName: Name of the ResourceGroup of the used SQL(Logical) Server

SQLServer: SQL(Logical) Server name

SQLServerDedicatedSQLPool: Name of the dedicated SQL Pool

SubsriptionId: SubscriptionId of Synapse Workspace

Pause: https://management.azure.com/subscriptions/XXX/resourceGroups/XXX/providers/Microsoft.Sql/servers/XXX/databases/XXX/Pause?api-version=2020-08-01-preview

Resume: https://management.azure.com/subscriptions/XXX/resourceGroups/XXX/providers/Microsoft.Sql/servers/XXX/databases/XXX/Resume?api-version=2020-08-01-preview

Status: https://management.azure.com/subscriptions/XXX/resourceGroups/XXX/providers/Microsoft.Sql/servers/XXX/databases/XXX/?api-version=2020-08-01-preview

To allow the Synapse workspace to call the REST API we need to give the Synapse workspace access to the SQL(Logical) Server. In the Access control (IAM) of the SQL(Logical) Server assign the SQL DB Contributor role to your Synapse Workspace.

Hopefully this article has helped you a step further. As always, if you have any questions, leave them in the comments.

My Virtual session at Data Toboggan

My Virtual session at Data Toboggan

An inaugural event specializing on Azure Synapse Analytics

Data Toboggan

This Saturday I've been speaking during Data Toboggan an inaugural event specializing on Azure Synapse Analytics. 12 Hours of sessions with amazing speakers.

Azure Purview

I presented a session about Azure Purview Microsoft's answer to Data Governance and Data Lineage

It was the first time ever that I presented this session in Public. I've been working on this session the last couple weeks. Presented several times to my colleagues. In any case, I was well prepared.
During the day I attended several sessions and all of them were of high quality.
My session started at 16:00 GMT and I explained in 45 minutes what Azure Purview can mean within a Data Estate. Personally, I was very satisfied with the presentation of my session.

A big applause for Mark, Richard and Victoria for the organization and of course for having me

 
Some useful links:


In case you have any questions left please feel free to ask them via the comment or Socials

Azure Purview Public Preview Starts billing

Azure Purview Public Preview Starts billing

Azure Synapse

by Erwin | Jan 18, 2021

Billing for Azure Purview(Public Preview)

As of January 20th 2021 0:00 UTC Azure Purview will starts billing.

Preview

From January 20 ,2021 Azure Purview will start billing. During the Public Preview, you will only be billed if you exceed the 4 capacity units for Azure Data Map and 16 vCore hours for scanning. These 4 capacity units and vCore hours are free until February 28, 2021.
So keep an eye on this so that you will not be faced with surprises after February 28th. What the prices will look like after February 28 is not yet known.

Update on pricing as of 27 februari,2021 can be found here 

Below an overview

Azure Purview Data Map

  Price
Capacity Unit €0.289 per 1 Capacity Unit Hour
Provisioned API throughput. 1 capacity unit = 1 API/sec
Includes 4 capacity units for free until February 28, 2021*.
Metadata Storage Free


Scanning and Classification

  Price
Power BI online Free in preview
SQL Server on-prem Free in preview
Other data sources €0.532 per 1 vCore Hour
Includes 16 vCore-hours for Free every month until February 28, 2021**.

Please find below the updated detail for pricing, which has been updated on Azure Purview pricing page on 1st of February 2021

*The 4 free capacity units are only available for customers on the Pay-As-You-Go (MS-AZR-0003P), Microsoft Azure Enterprise (MS-AZR-0017P), Microsoft Azure Plan (MS-AZR-0017G), Azure in CSP (MS-AZR-0145P), and Enterprise Dev/Test (MS-AZR-0148P) offer types. Free quantities are applied at the enrollment level for enterprise customers. Free quantities are applied at the subscription level for pay-as-you-go customers.
**The 16 vCore-hours of free scanning are only available for customers on the Pay-As-You-Go (MS-AZR-0003P), Microsoft Azure Enterprise (MS-AZR-0017P), Microsoft Azure Plan (MS-AZR-0017G), Azure in CSP (MS-AZR-0145P), and Enterprise Dev/Test (MS-AZR-0148P) offer types. Free quantities are applied at the enrollment level for enterprise customers. Free quantities are applied at the subscription level for pay-as-you-go customers. Note: Azure Purview provisions a storage account and an Azure Event Hubs account as managed resources. This may incur separate charges that in most cases will not exceed 2% of charges for scanning. Refer to the Managed Resources section in the Azure portal within Azure Purview Resource JSON.

Note:

Be aware if you add a lot of Azure Data Sources and scan them every day, you will quickly reach the number of hours. Choose for weekly or manual scans will be my advice.

Azure Purview vCore overview

Azure Purview Data Catalog

  Price
C0 Included with the Data Map
Search and browse of data assets
C1 Free in preview
Business glossary, lineage visualization and catalog insights
D0 Free in preview
Sensitive data identification insights


Azure Purview Pricing Overview

More details on pricing Pricing - Azure Purview

Azure Purview Documentation  Documentation - Azure Purview

Azure Purview Q&A Q&A -Azure Purview


In case you have unanswered questions please do not hesitate to contact me.

Feel free to leave a comment

How to setup Code Repository in Azure Data Factory

How to setup Code Repository in Azure Data Factory

Azure Synapse

by Erwin | Nov 5, 2020

Why activate a Git Configuration?

The main reasons are:

  1. Source Control: Ensures that all your changes are saved and traceable, but also that you can easily go back to a previous version in case of a bug.
  2. Continuous Integration and Continuous Delivery (CI/CD): Allows you to Create build and release pipelines for easy release to other Data Factory instance, manually or triggered(DTAP).
  3. Collaboration: You have the ability to easily collaborate in the same Data Factory with different colleagues.
  4. Performance: Your Data Factory from Git is 10 times faster then loading directly from the Data Factory Service.

So enough reasons to start enabling your Git Configuration.

How to setup your Code Repository in Azure Data Factory!

During the configuration/set up of your Data Factory you have the possibility to select either Azure DevOps or GitHub as your Git Configuration. If you haven't done that, you can still configure this integration in Azure Data Factory. The procedure for both options are the same.
Create ADF Version Control
In my previous article, Creating an Azure Data Factory Instance, I skipped the Git Configuration. In this article I will explain how to do this in an already created Data Factory.

Azure Data Factory Source Control

On the right of your splash screen when opening your Data Factory select the Setup Code Repository. Other options to start configuring your Code Repository are through the Management Hub or in the UX on the top left in the authoring canvas. If you don't see the option, Code Repository is already configured. You can check this in the Management Hub or UX.

We have the option to configure Azure DevOps or GitHub.

Azure DevOps integration

First I will take you through the configuration of Azure DevOps and then also create a similar configuration in GitHub. If you want to start directly in GitHub, click here.

Select Azure DevOps Git:

Azure Dev Ops Config

  1. Azure Active Directory: Select the AAD where your Azure DevOps environment is located. If you use another AAD, make sure that this account has rights to that environment.
  2. Azure DevOps Account: Select your Account.
  3. Project Name: Select the Project Name where you want to store your repository in.
  4. Git Repository: Create a new Project.
  5. Collaboration Branch: Change this to Main.
  6. Publish Branch: Leave this on adf_publish.
  7. Root folder: If you want to create a complete project with SQL,Azure Analysis Service, Azure DataBricks etc etc, you define a root folder and create your repository into that folder.
  8. Import: When this is a blank Data Factory, you can disable this option. When you have create already resources in your Data Factory, you should enable this so already created resources are committed to the repository.

Click on apply and you will see that you repository is connected.

Repo Connected

When you log in to your Azure Dev Ops Environment, you will see that a new Repository is created Main Branch. Azure Dev Ops Main

Go back to your Data Factory and click on Publish.

Data Factory Publish

In Azure DevOps the adf_publish Branch is now also created.Azure Dev Ops Publish

GitHub Integration

In the repository screen, select GitHub:

Github login

The first time you connect with your Data Factory you need to login in GitHub.

Github authorize

Once connect you to need to Authorize your Data Factory.

Github Configuration

All the settings are almost the same as in Azure DevOps:

  1. Use GitHub Server Enterprise: If enabled fill the The GitHub Enterprise root URL.
  2. GitHub Account: Select your Account.
  3. Project Name: Select the Project Name where you want to store your repository in.
  4. Git Repository: Create a new Project.
  5. Collaboration Branch: Leave this on Main.
  6. Publish Branch: Leave this on adf_publish.
  7. Root folder: If you want to create a complete project with SQL, Azure Analysis Service, Azure DataBricks etc etc, you define a root folder and create your repository into that folder.
  8. Import: When this is a blank Data Factory, you can disable this option. When you have create already resources in your Data Factory, you should enable this so already created resources are committed to the repository.

Click on apply and you will see that you repository is connected.

Repo Connected

Log in to your GitHub, a new Repository is created Main Branch. If you go back to your Data Factory and click on Publish.

Data Factory Publish

In GitHub the adf_publish Branch is now also created.

GitHub Publish

As you can see the Setup for Azure Dev Ops and GitHub are mostly the same. You have now learned how to connect your Data Factory to a Code Repository. You're now ready to start building your Release and build pipeline's.

Thanks for reading and in case you have some questions, please leave them in the comments below.

Feel free to leave a comment

Azure Data Factory Let’s get started

Azure Data Factory Let’s get started

Creating an Azure Data Factory Instance, let’s get started

Many blogs nowadays are about which functionalities we can use within Azure Data Factory. 
But how do we create an Azure Data Factory instance in Azure for the first time and what should you take into account?  In this article I will take you step by step on how to get started.

First we have to login in the Azure Portal.

Azure Data Factory

Search for Data Factories and select the Data Factory  service.

Create ADF

Secondly we have to create a Data Factory Instance.

Create ADF names

Fill in the required fields:

  1. Subscription => Select your Azure subscription in which you want to create the Data Factory.
  2. Resource Group =>Select Use existing, and select an existing resource group from the list or click on Create new, and enter the name of a resource group(a new Resource Group will be created)
  3. Region => Select the desired Region/Location, this is where your Azure Data Factory meta data will be stored and has nothing to do where you create your compute or store your Data Stores.
  4. Name = > Create a unique name in Azure.
  5. Version => Always select V2 here, this contains the very latest developments and functionalities. V1 is only used for migration from another V1 instance.

Select Next: Git configuration

Azure Data Factory Git Configuration

Enable the option to configure Git later,  we will configure this later in Azure Data Factory.

Select Next: Networking:

Create Azure Data Factory Networking

Leave the options as is. I will explain the Connectivity Method in one of my next articles.

Select Next: Review + Create:

Create Azure Data Factory Validation

Your Azure Data Factory Instance will be created. Once you have created your Azure Data Factory, it is ready to use and you can open it from selected Resource Groups above:

Open Azure Data Factory

Select Author & Monitor:

Azure Data Factory let's get started

Encrypt your Azure Data Factory with customer-managed keys

Azure Data Factory encrypts data at rest, including entity definitions and any data cached while runs are in progress. By default, data is encrypted with a randomly generated Microsoft-managed key that is uniquely assigned to your data factory. But you also Bring Your Own Key (BYOK) more details can be find in my previous written article “Azure Data Factory: How to assign a Customer Managed Key

Please be aware that you have to assign this key on an empty Azure Data Factory Instance.

Roles for Azure Data Factory

Data Factory Contributor role:

Assign the built-in Data Factory Contributor role, must be set on Resource Group Level if you want the user to create a new Data Factory on Resource Group Level otherwise you need to set it on Subscription Level.

User can:

  1. Create, edit, and delete data factories and child resources including datasets, linked services, pipelines, triggers, and integration runtimes.
  2. Deploy Resource Manager templates. Resource Manager deployment is the deployment method used by Data Factory in the Azure portal.
  3. Manage App Insights alerts for a Data Factory.
  4. Create support tickets.

Reader Role:

Assign the built-in reader role on the Data Factory resource for the user.

User can:

  1. View and monitor the selected Data Factory, but user can not edit or change it.

More on how to assign roles and permissions can be found here.

Thanks for reading, I my next blog I will describe how to Set up your Code Repository.