This Saturday I've been speaking during Scottisch Summit 2021. It was my first Summit, but is was a great event, with more than 400 sessions covering the full Microsoft Stack in 7 different language English, Spanish, German, French, Italian, Portuguese and Polish. Proud that I was to able to join and to present.
Azure Data Factory
I presented a session on if there is a way that we can build our Azure Data Factory all with parameters based on MetaData?
In the beginning of my sessions the audio wasn't that well. I just double checked my uploaded recording and in there audio was fine.
Source Control: Ensures that all your changes are saved and traceable, but also that you can easily go back to a previous version in case of a bug.
Continuous Integration and Continuous Delivery (CI/CD): Allows you to Create build and release pipelines for easy release to other Data Factory instance, manually or triggered(DTAP).
Collaboration: You have the ability to easily collaborate in the same Data Factory with different colleagues.
Performance: Your Data Factory from Git is 10 times faster then loading directly from the Data Factory Service.
So enough reasons to start enabling your Git Configuration.
How to setup your Code Repository in Azure Data Factory!
During the configuration/set up of your Data Factory you have the possibility to select either Azure DevOps or GitHub as your Git Configuration. If you haven't done that, you can still configure this integration in Azure Data Factory. The procedure for both options are the same. In my previous article, Creating an Azure Data Factory Instance, I skipped the Git Configuration. In this article I will explain how to do this in an already created Data Factory.
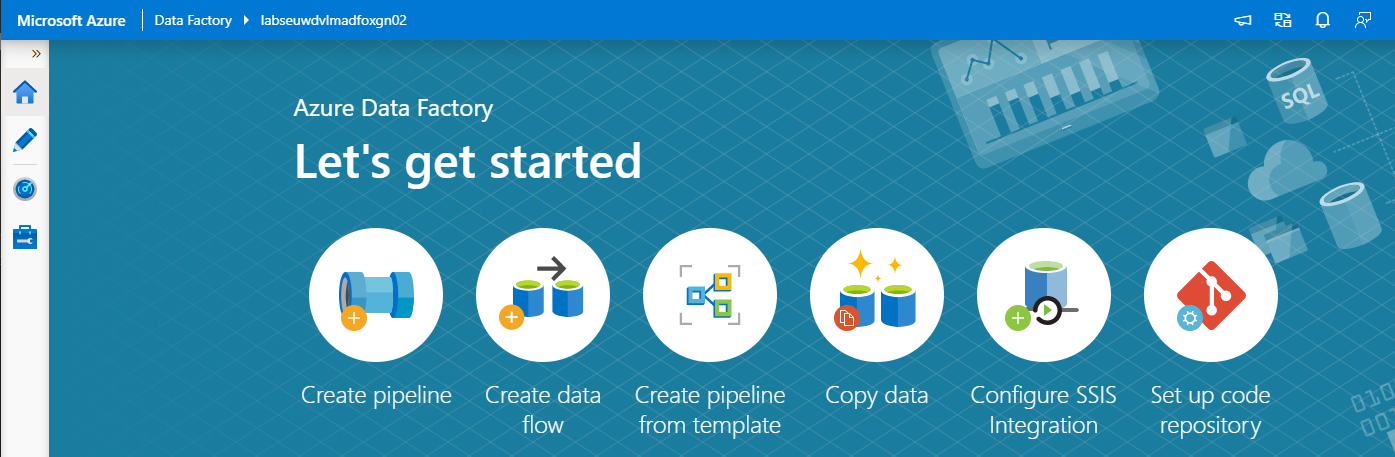
On the right of your splash screen when opening your Data Factory select the Setup Code Repository. Other options to start configuring your Code Repository are through the Management Hub or in the UX on the top left in the authoring canvas. If you don't see the option, Code Repository is already configured. You can check this in the Management Hub or UX.
We have the option to configure Azure DevOps or GitHub.
Azure DevOps integration
First I will take you through the configuration of Azure DevOps and then also create a similar configuration in GitHub. If you want to start directly in GitHub, click here.
Select Azure DevOps Git:
Azure Active Directory: Select the AAD where your Azure DevOps environment is located. If you use another AAD, make sure that this account has rights to that environment.
Azure DevOps Account: Select your Account.
Project Name: Select the Project Name where you want to store your repository in.
Git Repository: Create a new Project.
Collaboration Branch: Change this to Main.
Publish Branch: Leave this on adf_publish.
Root folder: If you want to create a complete project with SQL,Azure Analysis Service, Azure DataBricks etc etc, you define a root folder and create your repository into that folder.
Import: When this is a blank Data Factory, you can disable this option. When you have create already resources in your Data Factory, you should enable this so already created resources are committed to the repository.
Click on apply and you will see that you repository is connected.
When you log in to your Azure Dev Ops Environment, you will see that a new Repository is created Main Branch.
Go back to your Data Factory and click on Publish.
In Azure DevOps the adf_publish Branch is now also created.
GitHub Integration
In the repository screen, select GitHub:
The first time you connect with your Data Factory you need to login in GitHub.
Once connect you to need to Authorize your Data Factory.
All the settings are almost the same as in Azure DevOps:
Use GitHub Server Enterprise: If enabled fill the The GitHub Enterprise root URL.
GitHub Account: Select your Account.
Project Name: Select the Project Name where you want to store your repository in.
Git Repository: Create a new Project.
Collaboration Branch: Leave this on Main.
Publish Branch: Leave this on adf_publish.
Root folder: If you want to create a complete project with SQL, Azure Analysis Service, Azure DataBricks etc etc, you define a root folder and create your repository into that folder.
Import: When this is a blank Data Factory, you can disable this option. When you have create already resources in your Data Factory, you should enable this so already created resources are committed to the repository.
Click on apply and you will see that you repository is connected.
Log in to your GitHub, a new Repository is created Main Branch. If you go back to your Data Factory and click on Publish.
In GitHub the adf_publish Branch is now also created.
As you can see the Setup for Azure Dev Ops and GitHub are mostly the same. You have now learned how to connect your Data Factory to a Code Repository. You're now ready to start building your Release and build pipeline's.
Thanks for reading and in case you have some questions, please leave them in the comments below.
Creating an Azure Data Factory Instance, let’s get started
Many blogs nowadays are about which functionalities we can use within Azure Data Factory. But how do we create an Azure Data Factory instance in Azure for the first time and what should you take into account? In this article I will take you step by step on how to get started.
First we have to login in the Azure Portal.
Search for Data Factories and select the Data Factory service.
Secondly we have to create a Data Factory Instance.
Fill in the required fields:
Subscription => Select your Azure subscription in which you want to create the Data Factory.
Resource Group =>Select Use existing, and select an existing resource group from the list or click on Create new, and enter the name of a resource group(a new Resource Group will be created)
Region => Select the desired Region/Location, this is where your Azure Data Factory meta data will be stored and has nothing to do where you create your compute or store your Data Stores.
Name = > Create a unique name in Azure.
Version => Always select V2 here, this contains the very latest developments and functionalities. V1 is only used for migration from another V1 instance.
Select Next: Git configuration
Enable the option to configure Git later, we will configure this later in Azure Data Factory.
Select Next: Networking:
Leave the options as is. I will explain the Connectivity Method in one of my next articles.
Select Next: Review + Create:
Your Azure Data Factory Instance will be created. Once you have created your Azure Data Factory, it is ready to use and you can open it from selected Resource Groups above:
Select Author & Monitor:
Encrypt your Azure Data Factory with customer-managed keys
Azure Data Factory encrypts data at rest, including entity definitions and any data cached while runs are in progress. By default, data is encrypted with a randomly generated Microsoft-managed key that is uniquely assigned to your data factory. But you also Bring Your Own Key (BYOK) more details can be find in my previous written article “Azure Data Factory: How to assign a Customer Managed Key“
Please be aware that you have to assign this key on an empty Azure Data Factory Instance.
Roles for Azure Data Factory
Data Factory Contributor role:
Assign the built-in Data Factory Contributor role, must be set on Resource Group Level if you want the user to create a new Data Factory on Resource Group Level otherwise you need to set it on Subscription Level.
User can:
Create, edit, and delete data factories and child resources including datasets, linked services, pipelines, triggers, and integration runtimes.
Deploy Resource Manager templates. Resource Manager deployment is the deployment method used by Data Factory in the Azure portal.
Manage App Insights alerts for a Data Factory.
Create support tickets.
Reader Role:
Assign the built-inreader role on the Data Factory resource for the user.
User can:
View and monitor the selected Data Factory, but user can not edit or change it.
More on how to assign roles and permissions can be found here.
Thanks for reading, I my next blog I will describe how to Set up your Code Repository.
For my Azure Data Factory solution I wanted to Parameterize properties in my Linked Services. Not all properties are Parameterized by default through the UI. But there's another way to achieve this.
Linked Service
Open your existing Linked Services.
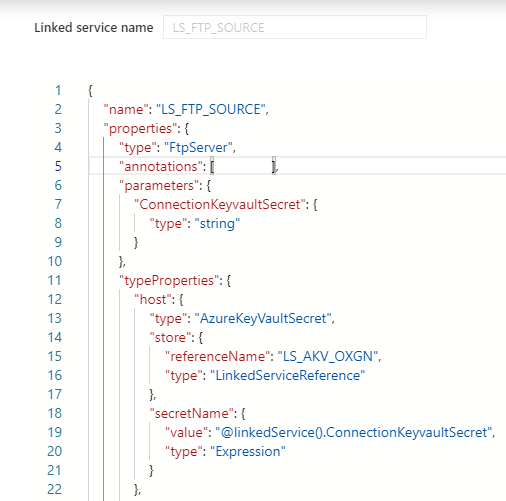
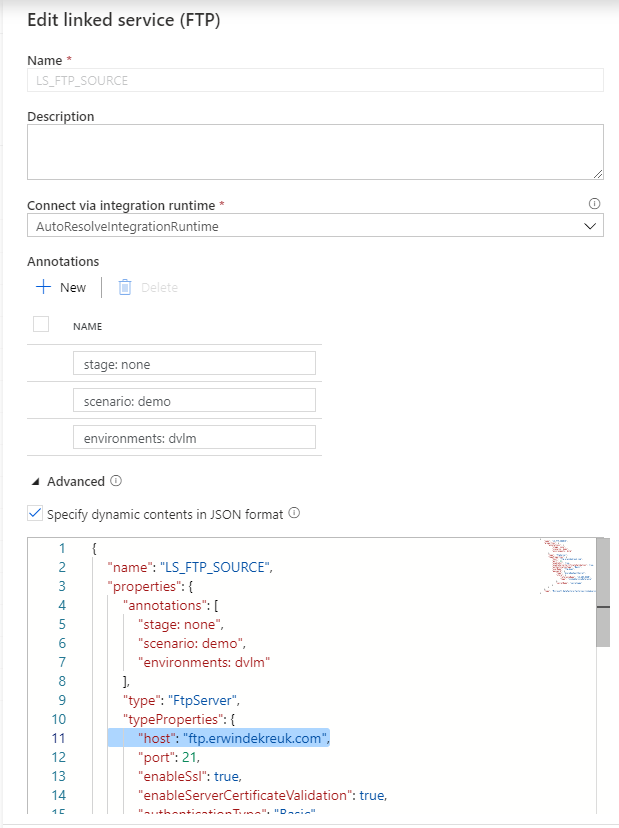
In this situation I want to Parameterize my FTP connection so that I can change the Host name based on a Azure Key Vault Secret.
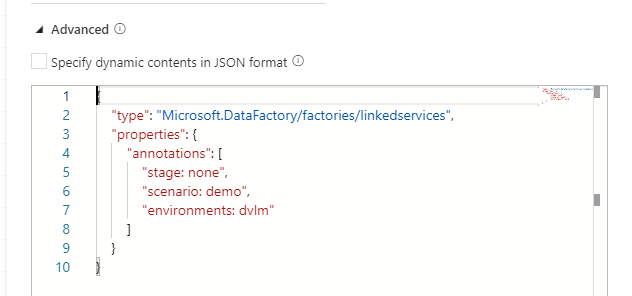
By default is this not possible through the UI but in the Bottom of your Linked Service there is a Advanced box
If you enable this box you can start building your own connection, but also create your own Parameters for this connection.
How to start:
As a base we will use the default code or our connection
After you have done this, you need to specify for which properties you want to use this parameter. In my case I want to read the parameter form my Azure Key Vault for my HOST propertie.
The JSON code below will now use above parameter as an input.
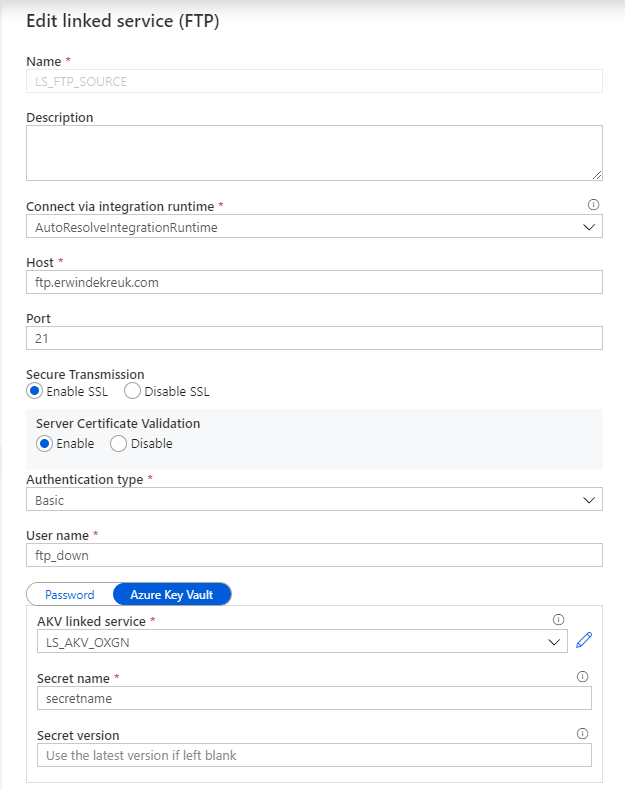
Save your connection and you will see that your UI is changed and that you have to define all your setting through the Advanced Editor.
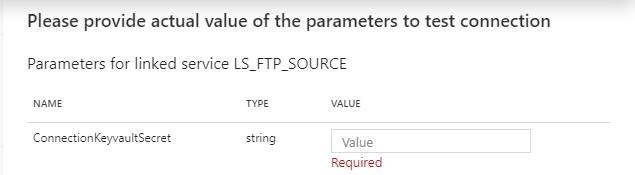
If you test your connection you will now see that you have to fill in a parameter.
And now you can create parameters of every TypeProperties within your connection.
The code below will create Parameters for your Host, Username and Password entries with Azure Key Vault enabled. For the authenticationType you have to choose between Basic and Anonymous. But can also at this to your Azure Key Vault.
More and more projects are using Azure Data Factory and Azure Synapse Analytics, the more important it is to apply a correct and standard naming convention. When using standard naming conventions you create recognizable results across different projects, but you also create clarity for your colleagues. In addition to that, it is easier to add these projects to other services such as Managed Services, Azure DevOps, etc etc, because standards are used.
To start with these naming conventions, I have made a list of suggestions with most common Linked Services. The list is not exhaustive, but it does provide guidance for new Linked Services.
There are a few standard naming conventions that apply to all elements in Azure Data Factory and in Azure Synapse Analytics.
*Names are case insensitive (not case sensitive). For that reason I’m only using CAPITALS.
*Maximum number of characters in a table name: 260.
All object names must begin with a letter, number or underscore (_).
Following characters are not allowed: “.”, “+”, “?”, “/”, “<”, ”>”,”*”,”%”,”&”,”:”,””
These rules are also defined on the following link
This post has been updated on Feb 2nd, 2023 with the latest connectors.
If your connector is not described(mostly connectors which are in Preview), please let me know. For more details for all the different connectors, check the connector overview
Pipeline
Even for Pipeline you can define naming conventions. I think the most important thing is that you always start your pipeline with PL_ followed by a Logic Name for you. You can for example use:
TRANS: Pipeline with transformations
SSIS: Pipeline with SSIS Packages
DATA: Pipeline with DataMovements
COPY: Pipeline with Copy Activities
Divers
NB: Notebook
DF: Mapping Dataflows
SQL: SQL Scripts
KQL: KQL Scripts
JOB: Spark job definition
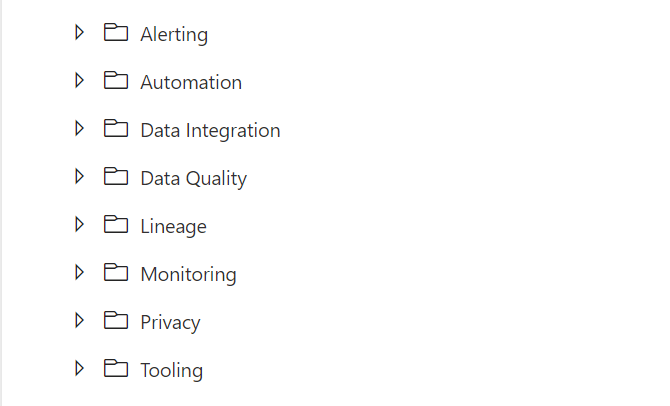
Once again these naming conventions are just suggestions. The most important thing is that you start using naming conventions and that you use the folder structure within the Pipelines (categories). Like the picture below as an example.
If you have suggestions just let me know by leaving a comment below.