
Goodbye 2020 Hello 2021

Goodbye 2020 Hello 2021

Erwin

by Erwin | Jan 3, 2021

Goodbye 2020 

Started to work for InSpark

Last year was certainly an eventful year. Started with a new job at InSpark and after 10 weeks we all know what happened, the first intelligent lockdown. The Netherlands was partially locked, but our office was immediately closed. Fortunately, all our applications run in the cloud and we were able to switch easily. But building a team in these times is not easy. I am really very proud of all my colleagues in the Data and AI team and of course all my other colleagues  from InSpark, we made a great year together. 

Managed Oxygen

With Managed Oyxgen, our Data Platform as a Service, we've made such great improvements that I wouldn't have thought that it was possible at the beginning of this year. Really cool and compliments to ones who worked so hard on it. On top of our Managed Oxyen we have worked with the whole team on our Sparkhouse Data Accelerator, a Metadata Framework which we can use to automatically extract data from different sources, building history with Delta Lake and load data into an Azure SQL Database/Pool for further transformations of the data.

Cool and innovative projects

We worked closely with Microsoft NL and Corp, but also with our mother company KPN. We're now seeing the effect of this, we've done such great projects and we're on our way for 2021, Projects using the latest Azure Data Services, image and photo recognition, IOT, Azure Synapse Analytics and Power BI. And for the first quarter we will
In any case, enough to look forward to. We are still looking for reinforcements for our team, so if you want to be part of these super cool projects let me know for sure.
I'm happy with the step I made a year ago and can definitely recommend it to anyone.

And when I look at myself.

Blog

My intention was to write more blogs and articles this year, in the end this only succeeded partly. It turned out to be 24, which is an average of 2 per month. Sometimes I just lacked inspiration, hopefully this inspiration will come back in 2021.
My top post on my website still remains Azure Data Factory Naming Conventions . Nice to see that more and more people are implementing the right standards within their organization.

Certifications

This year I wanted to get my DP-200 and DP-201, it finally became AZ-900 and DP-200. It's been far too long since I've done a certification. Of all the questions everyone really knows the right answer, but still when you see it on a screen and you have to give the correct answer, it is secretly quite difficult.
In any case, the DP-201 is on my agenda this year.

Events

My last personal event this year was SQL Konferenz in Darmstadt, Germany, in early March. Wow, how I miss these personal events. In addition to exchanging knowledge, the personal contacts that you build with everyone, it is also very valuable. With the virtual events this is a lot more difficult.
I was quite proud to be selected for SQL Bits, it remains one of the biggest events in Europe. However, it was a disappointment that it ended up becoming virtual instead of physical. Obviously the correct decision of the organization. You had to record the session yourself beforehand. During the event itself it was broadcast and you had to moderate your own session. Very strange to do that, but in the end I was happy with the result. The platform they used was really good. Compliments to the organization and the volunteers who made it a success for a while.
In addition to SQL Bits, I have spoken on a number of Virtual SQL Saturdays, I only started speaking virtual at the end of the year, but finally there aren't that many. I didn't like virtual speaking in the first time, but eventually I started to like it anyway. Before 2021, I have registered for a number of DataSaturdays and will be speaking at the Scottish Summit. Nice things to look forward to.

Whatever a year looks like, the most important thing is that everyone is healthy and safe. I look forward to a great collaboration with everyone.
Feel free to leave a comment

10 Days of Azure Synapse Analytics

10 Days of Azure Synapse Analytics

Erwin

by Erwin | Dec 9, 2020

10 Days of Azure Synapse Analytics

For the next 10 days, every day a different topic is explained about Azure Synapse Analytics. The shortest and easiest way to see how Azure Synapse Analytics can help you, to make decisions within your data landscape.

Day 1

👉 Unleash the power of predictive analytics in Azure Synapse with machine learning and AI

Day 2

👉 Quickly Get Started with Azure Synapse Studio

Day 3

👉Access and analyze all data from the Data Hub in Azure Synapse Analytics

Day 4

👉Using the Develop Hub with Knowledge Center to accelerate development with Azure Synapse Analytics

Day 5

👉Ingest and Transform Data with Azure Synapse Analytics With Ease

Day 6

👉Explore the Monitor Hub in Synapse Studio to keep track of all activities in your Synapse workspace

Day 7

👉Explore the Manage Hub in Synapse Studio to provision and secure resources

Day 8

👉Analyze and explore data with T-SQL in Azure Synapse Analytics

Day 9

👉Kickstart your Apache Spark learning in Azure Synapse with immediately available samples

Day 10

👉Integrate Power BI with Azure Synapse Analytics

Hopefully it will save you some time this collection of different blogs and will you get that much excited about Azure Synapse Analytics as I am. And like always, in case you have some questions feel free to ask them, I'm more then happy to answer them.

Get started with Azure Synapse Analytics

Do you want to know more on how to get started with Azure Synapse Analytics please read my blog series.

Feel free to leave a comment

Azure Synapse Analytics Code Repository has arrived

Azure Synapse Analytics Code Repository has arrived

Azure Synapse Analytics Code repository

‎I just opened my Azure Synapse Analytics Workspace and got a great surprise, the option Git Configuration is available as of today‎.


After a long wait, today the Git Configuration option became available in Azure Synapse Analytics.

The setup isn't much different from Azure Data Factory, which can be found in this link.

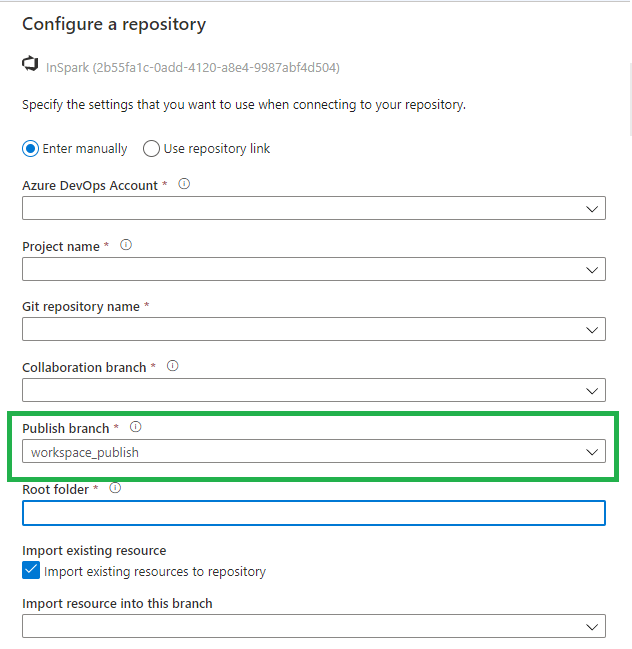
The difference is that we no longer use an adf_publish branch but a workspace_publish branch. Which makes sense if you want to use both Azure Services side by side. In this blog I do quick walkthrough with the Azure Dev Ops Configuration enabled.

Azure Synapse GIT Config

Once we have configured everything, we can walk through the Git Configuration options within Azure Synapse Analytics. I'm sure there will be a lot of them, but below is a list of the ones I noticed first.

Synapse live

After you published your code, it will be available in Synapse Live, like in Azure Data Factory you develop everything in Azure DevOps branches.

Synapse Live

Notebooks

After creating a Notebook, we have the option Commit, after you have committed it will be directly saved within your current working branch.

Azure Synapse Notebooks  Azure Synapse Notebooks

SQL Scripts

Like Notebooks,  After creating a SQL Script, we can Commit, after you have committed it will be directly saved within your current working branch.

Azure Synapse SQL Script

Azure Synapse SQL Scripts

Pipelines

Also here we have now a Commit option.

Azure Synapse Pipelines

Workspace_publish

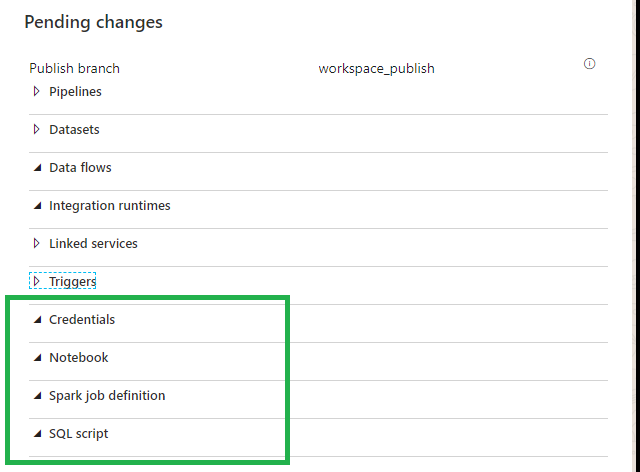
Beside the Notebooks and the SQL Scripts we can also store the Credentials and Spark Job definitions in Azure Dev Ops

Azure Synapse Publish

Differences

So as we can see the main differences between Azure Data Factory and Azure Synapse Analytics are:

Workspace_publish branch instead of adf_publish branch.

Commit instead of Save.

Azure Data Factory Pipelines

By moving your code from Azure Data Factory to Azure Synapse Analytics in Azure Dev Ops your Azure Data Factory Configuration will be available in Azure Synapse Analytics.

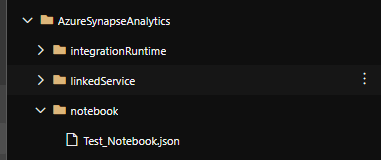
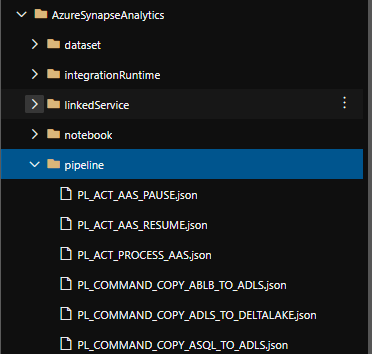
I added my ADF code to Azure Synapse in Azure Dev Ops and it looks the same.

Azure Synapse Dev Ops Example

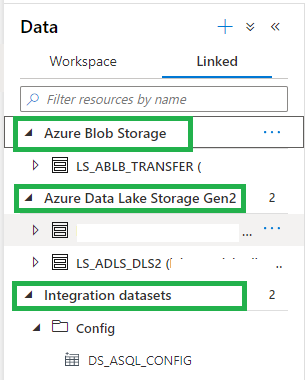
After Refreshing the Azure Synapse Analytics Workspace, in the Data Hub we see the Integration Datasets(ADF DataSets) and the Linked Storage accounts.

Azure Synapse Data Example

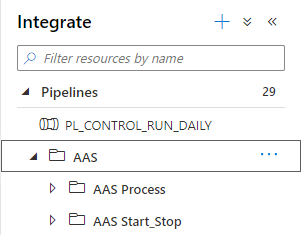
And in the Integrate Hub, we see all our Pipelines. And the same is working for our triggers

Azure Synapse PipeLine Example

It looks like that we can reuse our code quite easily. I haven't tested everything yet but I wanted to share this with you as quick as possible. I'm sure a easier way to migrate from Azure Data Factory to Azure Synapse will be on his way, you can use above as a start.

Integration Runtimes

Does everything work as in Azure Data Factory, NO at this moment you can't use the Azure SSIS Integration Runtime and the shared Self Hosted Integration Runtime? But hopefully this will take not that long before it will arrive.

Thank you for reading, this was a quick overview of the first changes I discovered. Please feel free to leave comment if you have discovered more.

Do you want to become more familiar with the various possibilities of Azure Synapse Analytics, please read the following articles which I published a while ago:

✅ Creating your Azure Synapse Analytics Workspace

✅ Exploring the new Azure Synapse Analytics Studio

Creating an Apache Spark Pool

Creating a SQL Pool

Integration with Power BI

How to setup Code Repository in Azure Data Factory

How to setup Code Repository in Azure Data Factory

Erwin

by Erwin | Nov 5, 2020

Why activate a Git Configuration?

The main reasons are:

  1. Source Control: Ensures that all your changes are saved and traceable, but also that you can easily go back to a previous version in case of a bug.
  2. Continuous Integration and Continuous Delivery (CI/CD): Allows you to Create build and release pipelines for easy release to other Data Factory instance, manually or triggered(DTAP).
  3. Collaboration: You have the ability to easily collaborate in the same Data Factory with different colleagues.
  4. Performance: Your Data Factory from Git is 10 times faster then loading directly from the Data Factory Service.

So enough reasons to start enabling your Git Configuration.

How to setup your Code Repository in Azure Data Factory!

During the configuration/set up of your Data Factory you have the possibility to select either Azure DevOps or GitHub as your Git Configuration. If you haven't done that, you can still configure this integration in Azure Data Factory. The procedure for both options are the same.
Create ADF Version Control
In my previous article, Creating an Azure Data Factory Instance, I skipped the Git Configuration. In this article I will explain how to do this in an already created Data Factory.

Azure Data Factory Source Control

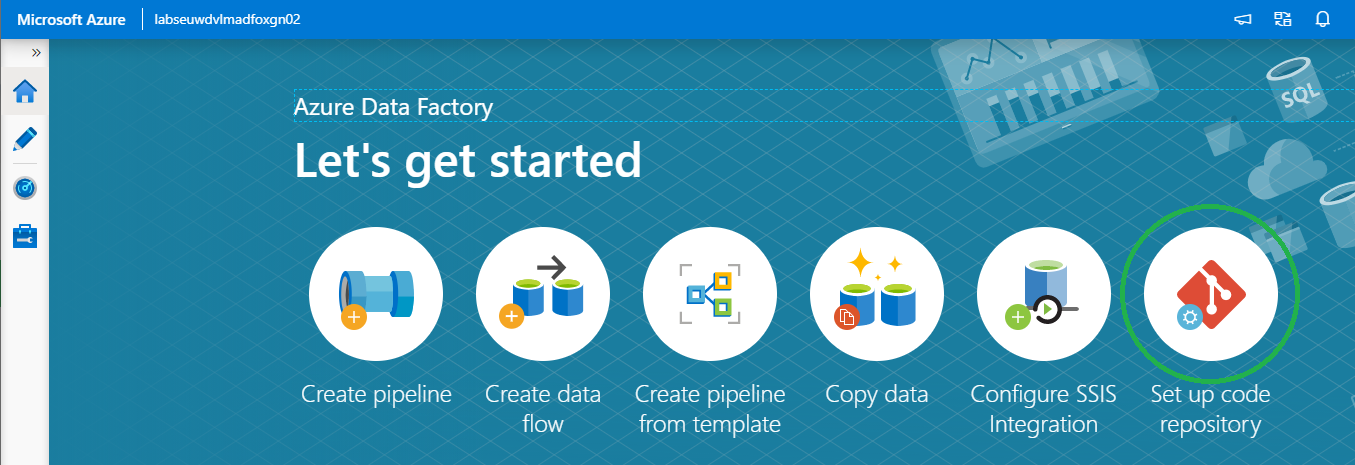
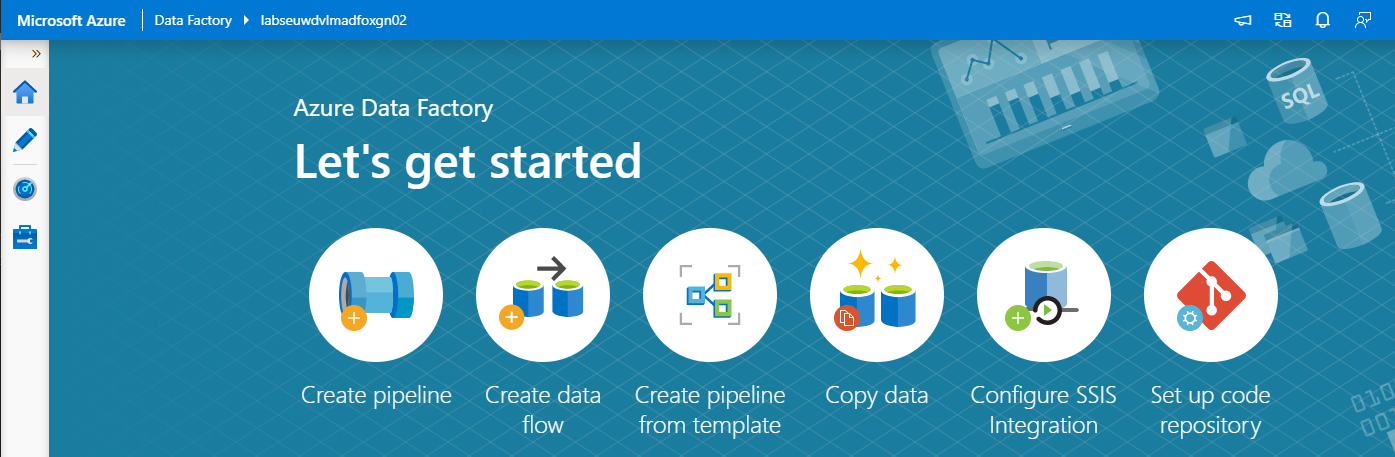
On the right of your splash screen when opening your Data Factory select the Setup Code Repository. Other options to start configuring your Code Repository are through the Management Hub or in the UX on the top left in the authoring canvas. If you don't see the option, Code Repository is already configured. You can check this in the Management Hub or UX.

We have the option to configure Azure DevOps or GitHub.

Azure DevOps integration

First I will take you through the configuration of Azure DevOps and then also create a similar configuration in GitHub. If you want to start directly in GitHub, click here.

Select Azure DevOps Git:

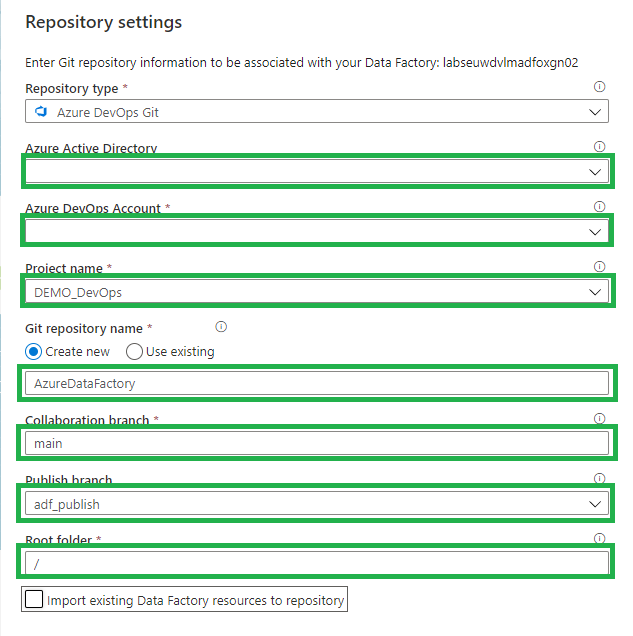
Azure Dev Ops Config

  1. Azure Active Directory: Select the AAD where your Azure DevOps environment is located. If you use another AAD, make sure that this account has rights to that environment.
  2. Azure DevOps Account: Select your Account.
  3. Project Name: Select the Project Name where you want to store your repository in.
  4. Git Repository: Create a new Project.
  5. Collaboration Branch: Change this to Main.
  6. Publish Branch: Leave this on adf_publish.
  7. Root folder: If you want to create a complete project with SQL,Azure Analysis Service, Azure DataBricks etc etc, you define a root folder and create your repository into that folder.
  8. Import: When this is a blank Data Factory, you can disable this option. When you have create already resources in your Data Factory, you should enable this so already created resources are committed to the repository.

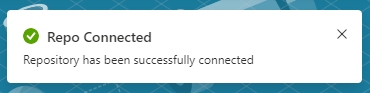
Click on apply and you will see that you repository is connected.

Repo Connected

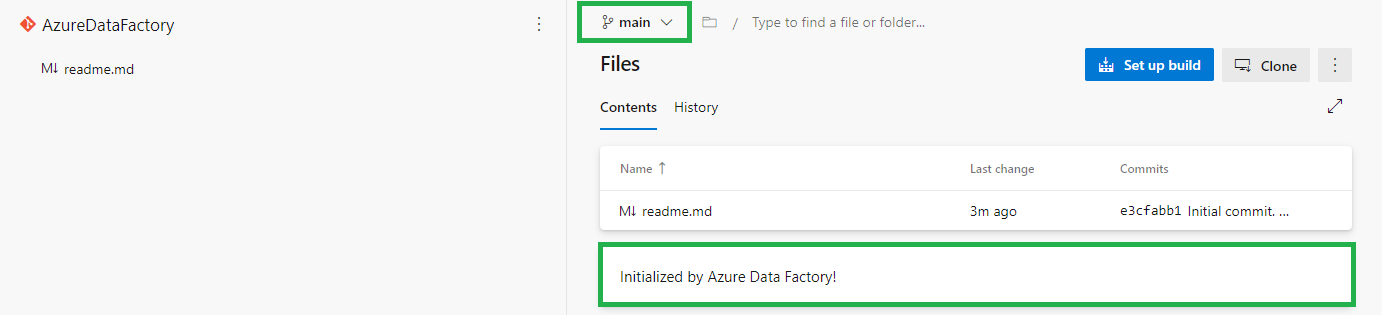
When you log in to your Azure Dev Ops Environment, you will see that a new Repository is created Main Branch. Azure Dev Ops Main

Go back to your Data Factory and click on Publish.

Data Factory Publish

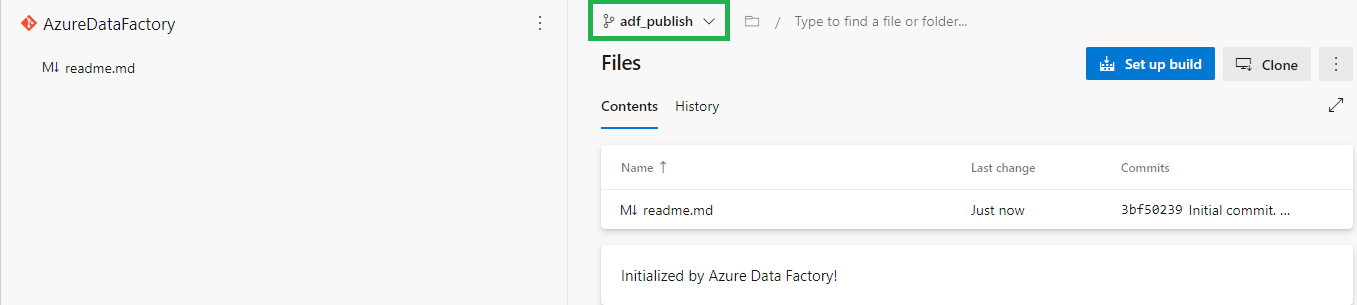
In Azure DevOps the adf_publish Branch is now also created.Azure Dev Ops Publish

GitHub Integration

In the repository screen, select GitHub:

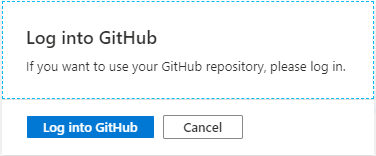
Github login

The first time you connect with your Data Factory you need to login in GitHub.

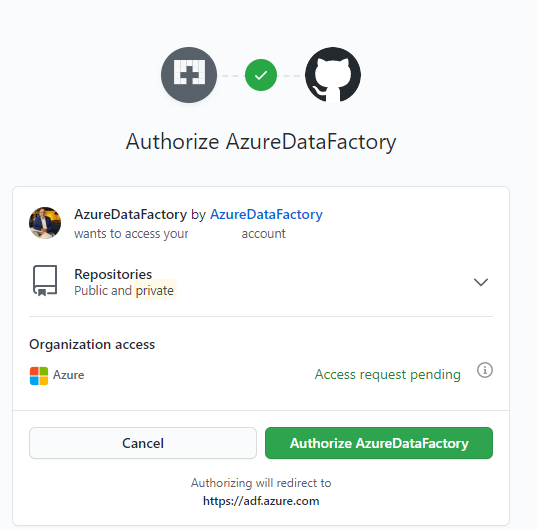
Github authorize

Once connect you to need to Authorize your Data Factory.

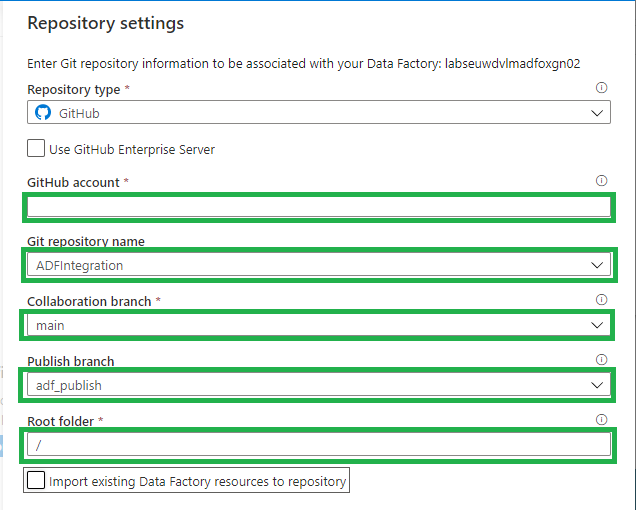
Github Configuration

All the settings are almost the same as in Azure DevOps:

  1. Use GitHub Server Enterprise: If enabled fill the The GitHub Enterprise root URL.
  2. GitHub Account: Select your Account.
  3. Project Name: Select the Project Name where you want to store your repository in.
  4. Git Repository: Create a new Project.
  5. Collaboration Branch: Leave this on Main.
  6. Publish Branch: Leave this on adf_publish.
  7. Root folder: If you want to create a complete project with SQL, Azure Analysis Service, Azure DataBricks etc etc, you define a root folder and create your repository into that folder.
  8. Import: When this is a blank Data Factory, you can disable this option. When you have create already resources in your Data Factory, you should enable this so already created resources are committed to the repository.

Click on apply and you will see that you repository is connected.

Repo Connected

Log in to your GitHub, a new Repository is created Main Branch. If you go back to your Data Factory and click on Publish.

Data Factory Publish

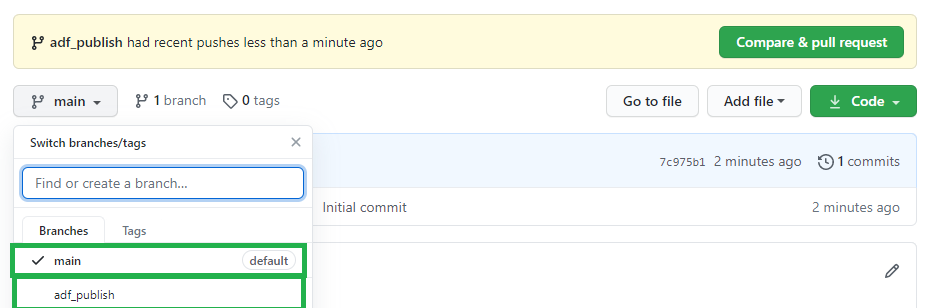
In GitHub the adf_publish Branch is now also created.

GitHub Publish

As you can see the Setup for Azure Dev Ops and GitHub are mostly the same. You have now learned how to connect your Data Factory to a Code Repository. You're now ready to start building your Release and build pipeline's.

Thanks for reading and in case you have some questions, please leave them in the comments below.

Feel free to leave a comment

Azure Data Factory Let’s get started

Azure Data Factory Let’s get started

Creating an Azure Data Factory Instance, let's get started

Many blogs nowadays are about which functionalities we can use within Azure Data Factory. 
But how do we create an Azure Data Factory instance in Azure for the first time and what should you take into account?  In this article I will take you step by step on how to get started.

First we have to login in the Azure Portal.

Azure Data Factory

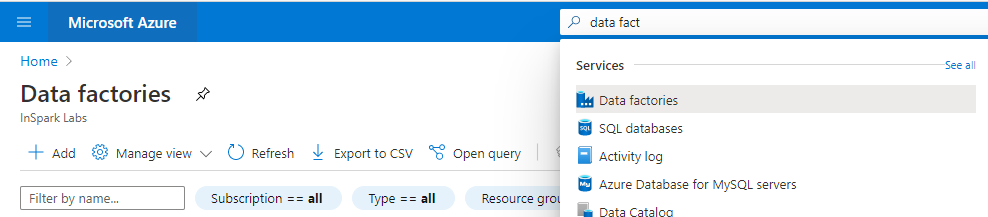
Search for Data Factories and select the Data Factory  service.

Create ADF

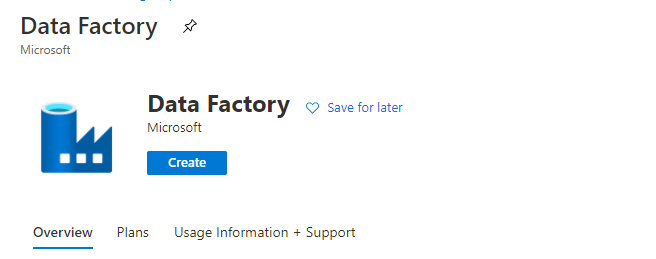
Secondly we have to create a Data Factory Instance.

Create ADF names

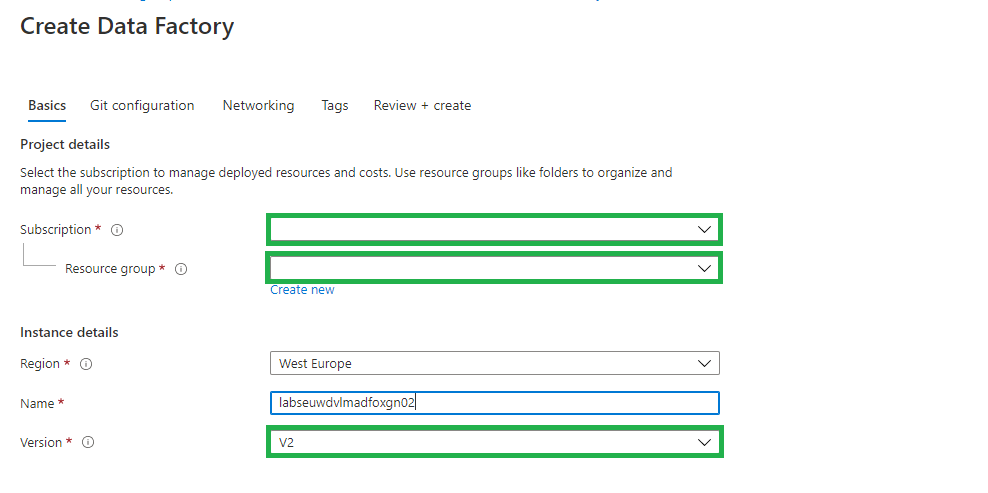
Fill in the required fields:

  1. Subscription => Select your Azure subscription in which you want to create the Data Factory.
  2. Resource Group =>Select Use existing, and select an existing resource group from the list or click on Create new, and enter the name of a resource group(a new Resource Group will be created)
  3. Region => Select the desired Region/Location, this is where your Azure Data Factory meta data will be stored and has nothing to do where you create your compute or store your Data Stores.
  4. Name = > Create a unique name in Azure.
  5. Version => Always select V2 here, this contains the very latest developments and functionalities. V1 is only used for migration from another V1 instance.

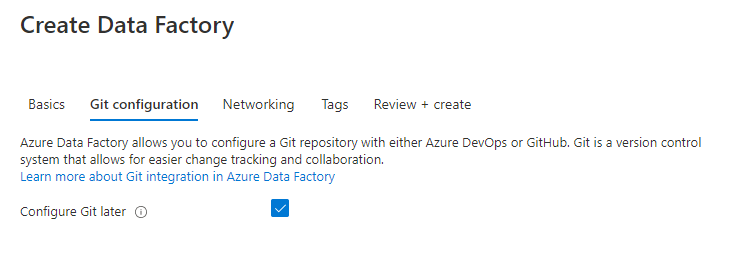
Select Next: Git configuration

Azure Data Factory Git Configuration

Enable the option to configure Git later,  we will configure this later in Azure Data Factory.

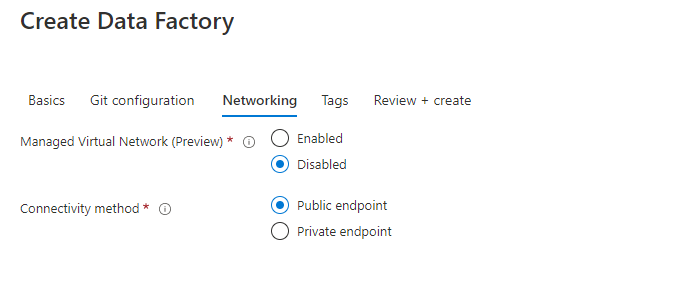
Select Next: Networking:

Create Azure Data Factory Networking

Leave the options as is. I will explain the Connectivity Method in one of my next articles.

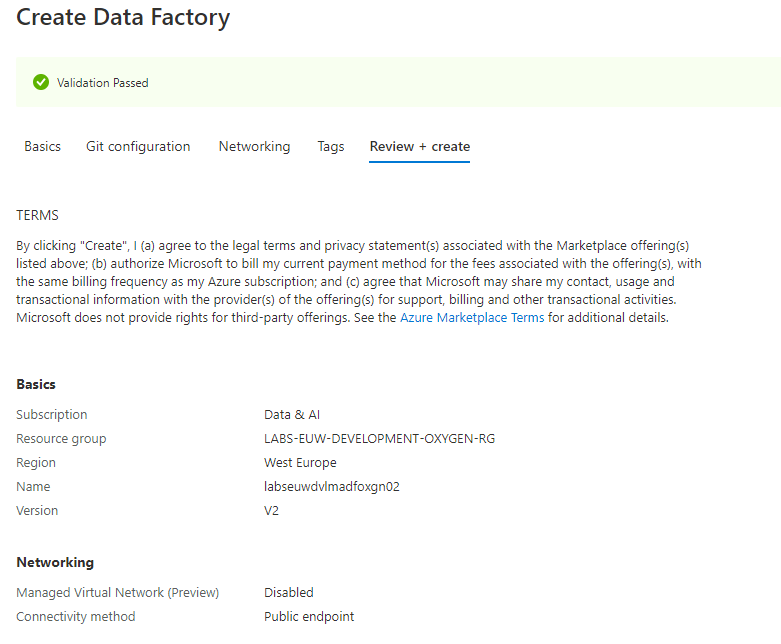
Select Next: Review + Create:

Create Azure Data Factory Validation

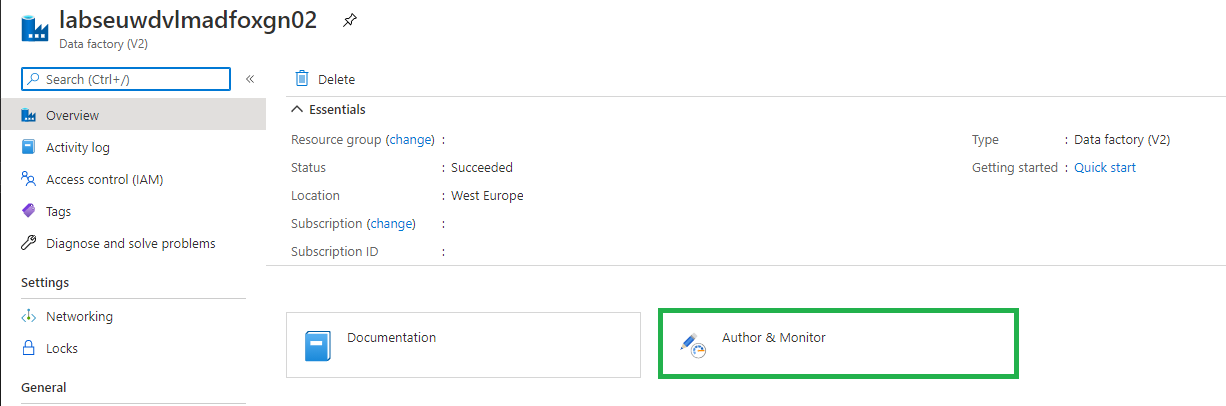
Your Azure Data Factory Instance will be created. Once you have created your Azure Data Factory, it is ready to use and you can open it from selected Resource Groups above:

Open Azure Data Factory

Select Author & Monitor:

Azure Data Factory let's get started

Encrypt your Azure Data Factory with customer-managed keys

Azure Data Factory encrypts data at rest, including entity definitions and any data cached while runs are in progress. By default, data is encrypted with a randomly generated Microsoft-managed key that is uniquely assigned to your data factory. But you also Bring Your Own Key (BYOK) more details can be find in my previous written article "Azure Data Factory: How to assign a Customer Managed Key"

Please be aware that you have to assign this key on an empty Azure Data Factory Instance.

Roles for Azure Data Factory

Data Factory Contributor role:

Assign the built-in Data Factory Contributor role, must be set on Resource Group Level if you want the user to create a new Data Factory on Resource Group Level otherwise you need to set it on Subscription Level.

User can:

  1. Create, edit, and delete data factories and child resources including datasets, linked services, pipelines, triggers, and integration runtimes.
  2. Deploy Resource Manager templates. Resource Manager deployment is the deployment method used by Data Factory in the Azure portal.
  3. Manage App Insights alerts for a Data Factory.
  4. Create support tickets.

Reader Role:

Assign the built-in reader role on the Data Factory resource for the user.

User can:

  1. View and monitor the selected Data Factory, but user can not edit or change it.

More on how to assign roles and permissions can be found here.

Thanks for reading, I my next blog I will describe how to Set up your Code Repository.