
Provision users and groups from AAD to Azure Databricks (part 6)
Configure the Enterprise Application(SCIM) for Azure Databricks Workspace provisioning
In one of my previous blogs, I explained how to setup the Enterprise Application for Azure Databricks account level provisioning. This blog is related to the Azure Databricks Workspace Level. This is a slightly different setup hence a separate blog.
Preview
Provision identities to your Azure Databricks workspace is still in preview
Steps to configure
Login to the Azure Databricks Workspace as a workspace admin.
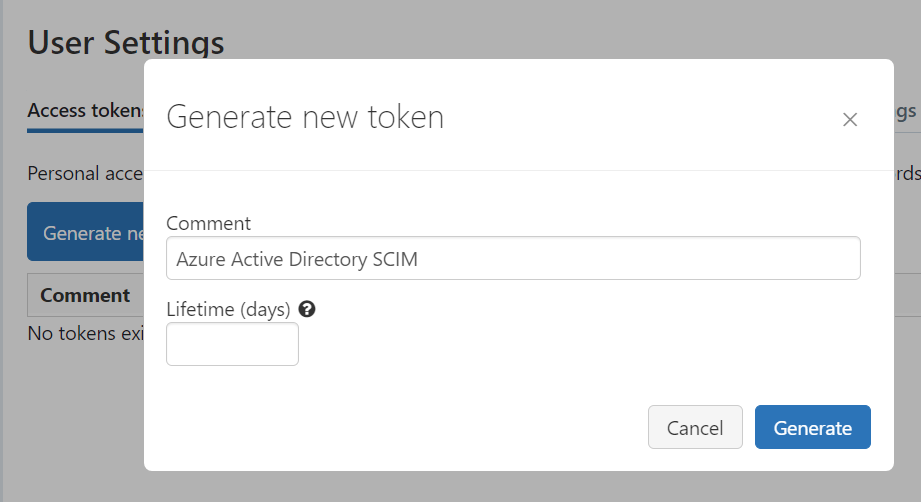
Generate a personal acces token and store it in a save location(Azure Key Vault)
Configure the Enterprise Application
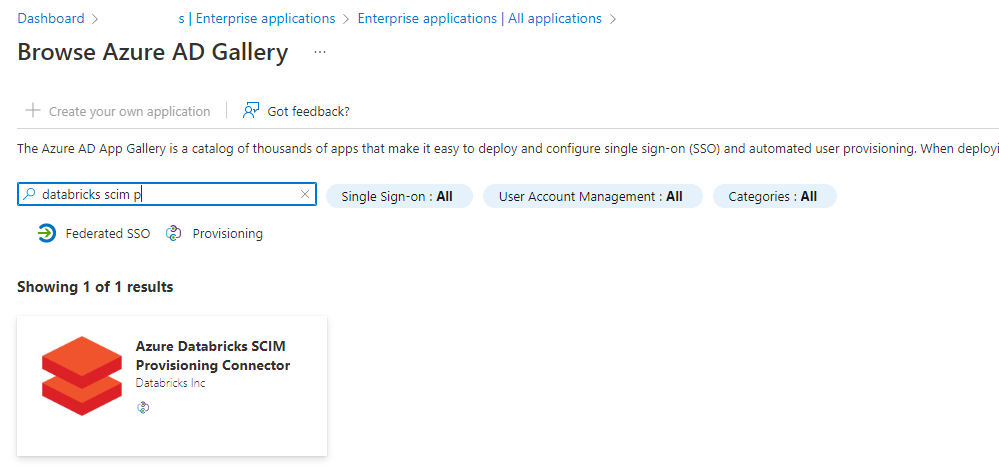
In the Azure portal, go to Azure Active Directory > Enterprise Applications.
Click on new application and search for the "Azure Databricks SCIM Provisioning Connector"
Click on the app:
Enter a Name for the application, I used Azure Databricks SCIM MyAzureDatabricksWorkspace
Click on Create and wait until the application is created.
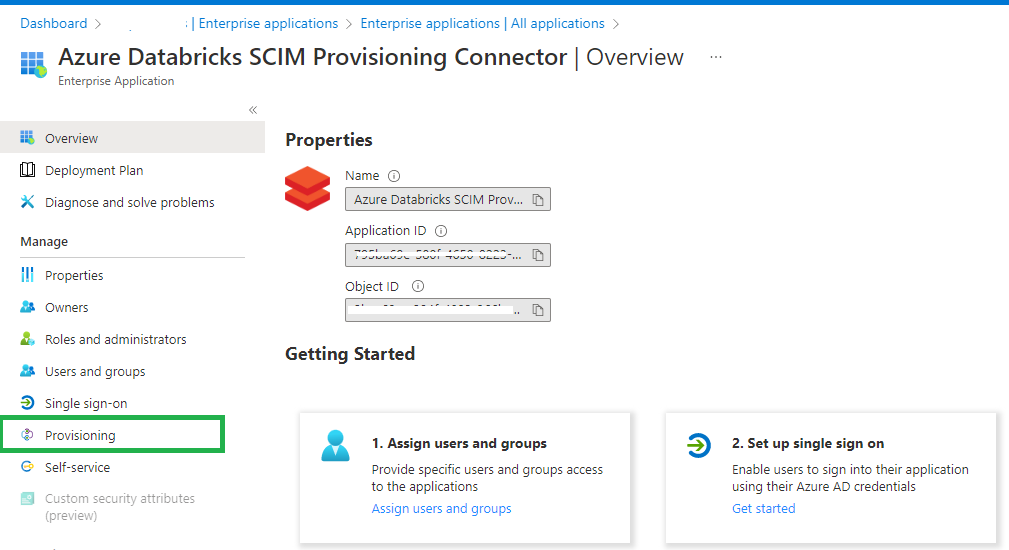
Click on Provisioning and set Provisioning Mode to Automatic.
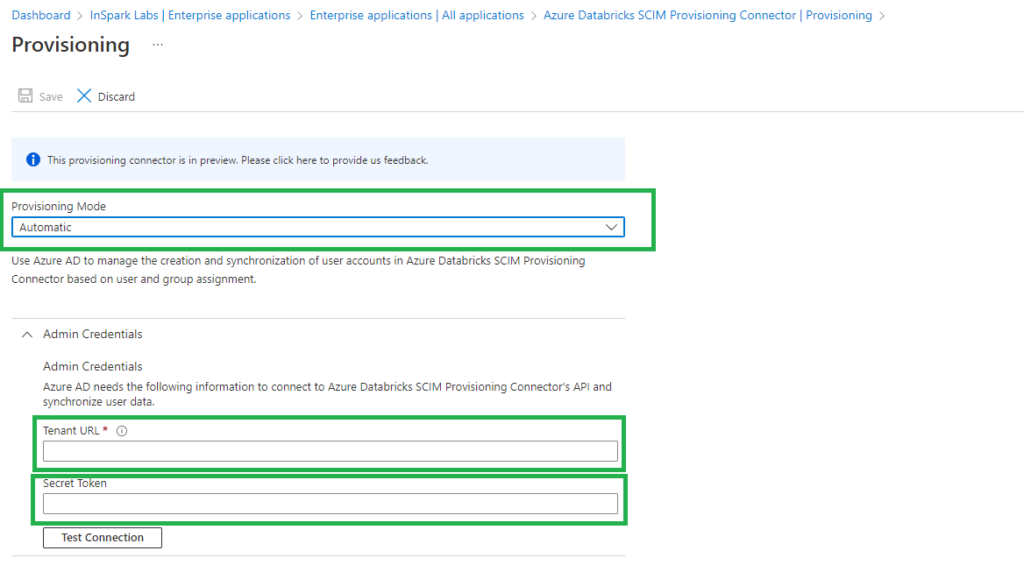
Set the Tenant URL to https://<databricks-instance>/api/2.0/preview/scim
Set Secret Token to the Azure Databricks token that we generated and saved earlier in our Key Vault.
Click on Test Connection so see if everything is configured correctly.
You can learn how to assign and sync users in the following blogs as this is a similar approach to setting up at the account level.
- Assign and Provision users and groups in the Enterprise Application(SCIM)
- Assign Users and groups to an Azure Databricks Workspace and define the correct entitlements
Add Service principal to your Azure Databricks workspace
As a security best practice, Databricks recommends using an Azure AD service principal and its Azure AD token instead of your Azure Databricks user or your Databricks personal access token for your workspace user to give CI/CD platforms access to Azure Databricks resources. More details can be found in the following link Service principals for CI/CD
To add a service principal using Postman:
- Create a new HTTP request (File > New > HTTP Request).
- In the HTTP verb drop-down list, select POST.
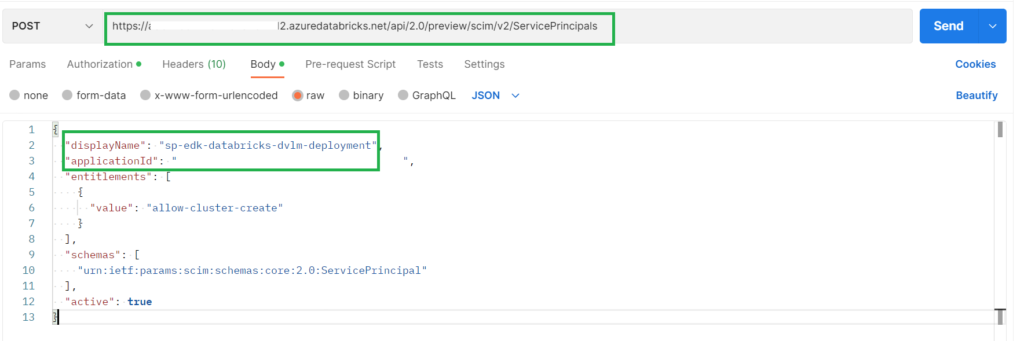
- Enter in the request URL https://DATABRICKS ID.azuredatabricks.net/api/2.0/preview/scim/v2/ServicePrincipals
- On the Authorization tab, in the Type list, select Bearer Token.

- For Token, enter your Databricks personal access token for your workspace user.
- On the Headers tab, add the Key and Value pair of
Content-Typeandapplication/scim+json - On the Body tab, select raw and JSON.
- add
{"displayName": "sp-edk-databricks-dvlm-deployment","applicationId": "xxxxx","entitlements": [{"value": "allow-cluster-create"}],"schemas": ["urn:ietf:params:scim:schemas:core:2.0:ServicePrincipal"],"active": true}

Click on send and the Service Principal is added to the Databricks Workspace and is ready for further usage. You can find the Service Principals in the admin console, groups, users.
When you use Postman I advise you to work with Environments and variables, this makes the reusing of scripts a lot easier. In this blog I have not done that for simplicity.
This was my last blog in the series, I hope you enjoyed reading these blogs. A summary of these blogs can be found below. If there are any questions or ambiguities, I would of course be happy to hear and answer them.
Other Blog post in this serie:
- Configure the Enterprise Application(SCIM) for Azure Databricks Account Level provisioning
- Assign and Provision users and groups in the Enterprise Application(SCIM)
- Creating a metastore in your Azure Databricks account to assign an Azure Databricks Workspace
- Assign Users and groups to an Azure Databricks Workspace and define the correct entitlements
- Add Service Principals to your Azure Databricks account using the account console
- Configure the Enterprise Application(SCIM) for Azure Databricks Workspace provisioning
- Fabric Metadata Driven Framework July 2026 Release Notes

- Reassigning Microsoft Fabric Capacities in Bulk: Don’t Let an Expiring Trial Catch You by Surprise
- Bringing Column-Level Lineage from Microsoft Fabric to Microsoft Purview with FMD
- My first experience: Building a Fabric App
- Fabric Metadata Driven Framework update May 2026


Feel free to leave a comment
Discover more from Erwin | Data & Intelligence
Subscribe to get the latest posts sent to your email.
0 Comments